-->

Saturday, October 31, 2009

Saturday is a special day...

It's the day I blog about what I made from food storage this week!

Before we started this blog, I would have been so lost in an emergency. I would have looked in my pantry and thought, what can I do with dry peas and cream of chicken soup??? Thankfully, now I buy with a plan and have recipes on hand. And once a week, I make something using ONLY non-perishables, to make sure my family likes it and to train myself on how to do it, just in case.

This week, I cooked up some dry chickpeas and made that hummus again. It was dee-vine. I spread it on tortillas, on homemade bread, on carrots. I may have even eaten some plain. Maybe.

I also had lots of chickpeas left over, so I will probably make the Tomatoes and Chickpeas recipe that Abbie shared yesterday.

Did you make anything completely from your food storage this week? Get in the habit... it will pay off in an emergency, guaranteed.

Friday, October 30, 2009

Food Storage Friday: Tomatoes and Chickpeas

Mountain Man and I are always trying to find different recipes with beans, to save money and eat healthier. We definitely found a winner with this one. Original recipe here.


Ingredients: chickpeas, whole tomatoes, cumin, coriander, olive oil, cinnamon stick, red pepper flakes, ground ginger (or fresh ginger, which stores remarkably well in the freezer), mint, parsley


First off you combine all the spices and herbs (minus parsley and mint) in heated oil and cook about two minutes. Your kitchen is going to smell amazing.


Add in your whole tomatoes, I don't see why you couldn't do this with fresh tomatoes if you had some from your garden.


Use a wooden spoon to break up the tomatoes into smaller pieces.


Add the chickpeas, the star ingredient. I've really begun to love chickpeas. Mainly because of this recipe. Oh my, I love me some hummus.


Simmer, stirring every once in a while until thicker. About twenty minutes. Then chuck the cinnamon stick--you don't need it anymore.


Ladle over rice.


We have mint growing in our garden (garden=food storage), so we topped our dishes with it. Mint grows like a weed by the way. If there's one thing anyone can grow it's mint. Grow it in a pot though, otherwise you'll have it all over your yard--like I said, a weed.


The parsley is dead though, so dried works fine.


This was absolutely delicious served over rice, and chock full of protein! When rotating, serve with sour cream or plain yogurt.


We had a bit of leftovers, so later in the week we mashed it up and fried them as pancakes. Then served them with a fried egg on top. Yum-o


Tomatoey Spiced Chickpeas
Epicurious.com

1/3 cup extra-virgin olive oil
1 tablespoon ground cumin
1 tablespoon ground coriander
1 teaspoon ground ginger
Rounded 1/4 teaspoon hot red-pepper flakes
1 (1 1/2-inch) piece cinnamon stick
1 (28-ounce) can whole tomatoes in juice
2 (15-ounce) cans chickpeas, rinsed and drained
1/2 cup chopped flat-leaf parsley
1/4 cup finely chopped mint


Heat oil in a 12-inch heavy skillet over medium heat until it shimmers, then cook cumin, coriander, ginger, red-pepper flakes, and cinnamon stick, stirring constantly, until fragrant and a shade darker, about 2 minutes.

Add tomatoes with juices, breaking up tomatoes with a spoon, then add chickpeas. Simmer, stirring occasionally, until slightly thickened, about 20 minutes. Discard cinnamon stick.

Stir in parsley and mint. Serve warm or at room temperature.

Thursday, October 29, 2009

Basic Cooking Skills: Basic Brownies

Every other Thursday we will post about different basic cooking skills. Knowing how to prepare meals from scratch is a very important step in becoming self-reliant, which in turn is a crucial component of being prepared. Being able to cook meals for your family will give you confidence, more family togetherness time, and lower your food budget=more money for food storage! If you have a basic cooking skill you'd like to learn, email us! These meals contain perishable food items as this is a different series than our food storage recipes.

Now, most of you are thinking, brownies? Who needs to know how to make brownies? The box always tastes better!


Which is true, box brownies are delicious and easy. But here's a "just as easy" recipe which will be great to have in your arsenal if you just don't want to/or can't run to the store.


Ingredients: Sugar, flour, cocoa powder, vanilla, eggs and butter


Start by melting the butter. You can do it in the microwave too. I usually do melt the butter in the microwave, but I just broke the glass rotating dish in my microwave. Anyone know where you can pick up one of those?


Start mixing ingredients. This here is your basic brownie mix: sugar, flour and cocoa powder


butter


eggs


vanilla


done.


Grease a baking dish. (Can you tell I've been painting?)


And pop it in the oven.


A couple extra steps is all it takes.


These brownies are delicious. If you want thicker brownies you can decrease the size of your pan. I like to make them in large pie dishes and cut them into wedges. Another variation is one of our favorites. Layer half the brownie batter in the pan, then layer three symphony bars on top and finally cover up with the rest of the batter, bake as usual. Oh yum.


Basic Brownies

1 cup butter, melted
2 cups sugar
1 1/2 cups flour
4 eggs
1/4-1/3 cup cocoa (depending on how dark you like your brownies)
1 tsp vanilla
salt-dash

Mix ingredients together and bake at 350 degrees F. for 35-40 minutes.

Tuesday, October 27, 2009

Cold Weather Preparedness

As the weather turns cold, there are some extra precautions we should take in order to ensure that our families stay safe, especially if the power goes out or we are traveling.

Make sure your car kits are up to date. If you didn't put together a kit last time we did them week by week, click here to check out the list of what we recommend. Consider adding some extra blankets and towels, especially if you live in colder climates, and definitely if you regularly drive on rural roads. Be sure to have some food in there, too, as well as water. Many people have asked us about water going bad in plastic bottles over time. If you rotate, this won't be an issue, especially in the winter. (It can be an issue in the summer, but if I had a choice between drinking water that may have a few chemicals in it or getting dehydrated, I would choose to drink the water. Just rotate it every so often!) You should have a kit in every car your family drives.

Keep your cell phones charged. I plug in my cell phone every night, regardless of whether or not I need to. You never know when the power is going to go out and you won't have a chance to charge it. Although, I DO have a cell phone charger outlet in my crank powered flashlight in my 72-hour kits, in case I need it. An upgrade: buy some walkie-talkies to share with your neighbors so that you can keep in contact during an emergency, in case the phone lines are down.

Have proper heating backups. Technically, you can safely keep your house at a cool 40
degrees without worrying about health hazards or your pipes freezing. Layer up - blankets, warm clothing, etc. Consider getting some space heaters or other alternative heat sources in case your power goes out. Of course, make sure you know how to operate them properly before you actually need to use them in an emergency. An upgrade: get a generator. Neither Abbie nor I have these, but with some online research I'm sure you could find one that's perfect for your home.

Know where your flashlights are. Sometimes the most annoying part of losing power is actually trying to find those flashlights, especially if it's completely dark! I hate digging through our 72-hour kits to find our lighting sources. It would be helpful to buy a cheap flashlight to keep somewhere in each room. The key for me will be keeping it in a place where I can easily find it in the dark, but hiding it well enough so that my two-year-old doesn't see it and demand to play with it, thus wearing out the batteries. An upgrade: keeping a wind-up flashlight in each room

Bundle up. When I was growing up, my parents kept a big wooden box full of hats, mittens, and scarves in our mudroom. Every time we left the house during the winter, we were required to put them on. At the time I was pretty embarrassed (high schoolers don't usually wear knit hats with reindeer on them), but I now appreciate the precautions. We drove on a lot of rural roads in New England, and I wasn't driving the most reliable car (a 17 y/o VW Quantum...), so if we had ever broken down on the side of the road, those warm layers would have really come in handy. Actually, they came in handy anyway because I was usually to my destination before the heat started to work. There's no real upgrade for bundling up.

For more ideas and tips for storm/power loss preparation, check out a guest post from last winter, "What I Wish I'd Known During the 2008 Ice Storm".

What do you do to prepare for cold weather?

Tuesday!

Every Tuesday, we post specific items you should gather in order to supplement your 72-hour kit, your 3-month supply, and your longer-term storage. If you are new to our blog, don't worry! You won't be left behind. Just start up where we are and follow along. You will eventually have everything completed! Once the 72-hour kit is complete, we'll be putting together emergency car kits again (week by week). Once those are done, we'll gather the 72-hour kits again. So don't worry, just jump on in and join us where we are today!

This week for your 72-hour kits, add your food. This may take a while (and will take a bit of money), so we're going to spend two weeks on this one. Abbie wrote a great article last week about 72-hour kit food, so go back and refer to that when you're deciding what food to put in your kits. Be sure to read the comments, too, because people gave some great ideas! And even though we're giving you two weeks to complete this, don't wait until the last minute! It really takes some planning to decide what foods you want to include. It's also helpful to come up with a whole menu plan ("Day One Meals and Snacks", "Day Two Meals and Snacks", etc) so that if you are in an emergency, you don't accidentally eat all your food during the first day or two!

How is your three-month supply coming along? Slow and steady is the way to go. Stock up on sales as they happen. Remember, it doesn't have to be overwhelming. Just plan your meals and make a master shopping list, and cross off items as you buy them. Just be sure to keep track of what you eat so that you can replace it the next time you grocery shop. Don't have time to plan out non-perishable meals and make up a grocery list? We've done it for you in our e-book.

We are still gathering "other" items for our longer-term storage this month. This includes pasta, powdered milk, spices, yeast, honey.... pretty much anything you want to stock up on besides the basics (candy, perhaps?? Be sure to hit those post-Halloween sales!).

Monday, October 26, 2009

Inspirational Thought

"Though we never know when we will face a challenge that will require us to depend on the resources we have stored, we know that the Lord has said, “If ye are prepared ye shall not fear” (D&C 38:30).

"President Gordon B. Hinckley reminded us in October 2005 general conference of our need to be prepared: 'We can so live that we can call upon the Lord for His protection and guidance. This is a first priority. We cannot expect His help if we are unwilling to keep His commandments. … I have faith … that the Lord will bless us, and watch over us, and assist us if we walk in obedience to His light, His gospel, and His commandments.'

"Let us do all in our power to 'walk in obedience' and be prepared."


“Are You Prepared?,” Ensign, Aug 2007, 30–33

Saturday, October 24, 2009

Roundup: Chicken in a Crockpot


I was really happy to see a tutorial on preparing a whole chicken in a crockpot from Happy Housewife. Cooking an entire chicken is something that I'm quite shy about (slash scared to death) but this post made it seem very easy and manageable. Plus there's the added bonus about getting the chicken broth to boot. A great basic cooking skill to have!

Have loads of wheat but no grinder? Check out this post from Food Storage Made Easy about 7 ways to use wheat without a wheat grinder.

**************************************

For our designated food storage meal this week I made burritos. Instead of just eating away, we loaded the beans into the tortillas and baked them for a few minutes to set them. Check out my awesome cell phone picture. Why can't you ever find your camera when you need it?


And yes, because I'm mom I got the dregs of the chip bag!


What did you make from your food storage this week?

Friday, October 23, 2009

Food Storage Friday - Spaghetti with Artichoke Hearts and Tomatoes


This recipe is based on Pioneer Woman's recipe of the same name. I love her recipes and was so excited to see this one posted last week, since it was already almost completely made with food storage ingredients - I just had to make a few minor tweaks.

Ingredients: olive oil, garlic, canned tomatoes, evaporated milk, artichoke hearts, chicken broth (I used bouillon cubes), nutmeg, salt, pepper, and pasta.

Heat the olive oil in a pot, and saute your garlic

Next, add your canned tomatoes (with the juice) and your drained artichokes. Simmer for 8-10 minutes.

Meanwhile, you should be cooking your pasta according to the package directions...

Chicken broth, check.

Evaporated milk, check. Pioneer Woman used cream.

Add the evaporated milk and chicken broth...

...and the nutmeg, salt, and pepper.

When your pasta is al dente, add that too.

Yum! This meal is delicious as-is, so it's a great pantry-only meal. If you're eating this meal on a regular night (not in an emergency, just rotating), you could add Parmesan cheese and fresh chopped chives, or any other fresh herbs.

Spaghetti with Artichoke Hearts and Tomatoes

2-3 Tbsp olive oil
3 cloves garlic
1 14.5-oz can artichoke hearts, drained well
1 14.5-oz can diced tomatoes, with juice
1 cup evaporated milk
1/2 - 1 cup chicken broth
1/4 tsp nutmeg (PW added 1/2 tsp - you decide)
salt and pepper to taste
1 lb pasta

Cook pasta according to the package directions.

Meanwhile, heat your oil and saute the garlic for a few minutes. Then, add your drained artichokes and tomatoes (with juice) and simmer for 8-10 minutes. Stir in your evaporated milk and chicken broth, and the salt, pepper and nutmeg. Let it simmer for another minute or two, then add your al dente pasta. Stir and enjoy! Add Parmesan cheese if you have it on hand.

Thursday, October 22, 2009

Review: Adequate Nutrition During An Emergency

While perusing the Ensign this week, a monthly magazine published by The Church of Jesus Christ of Latter-day Saints, I came across this article written by a nutritionist on having adequate nutrition during an emergency.

I was immediately interested because the food in my 72 hour kits is mostly ramen noodles, peanut butter and saltine crackers. For review purposes, I am copying and pasting the article here, but please remember that the actual article was published in the October issue of the Ensign. My notes are in red.

Adequate Nutrition during an Emergency

Miriam Blackham Een, Nevada, USA

Miriam Blackham Een, “Adequate Nutrition during an Emergency,” Ensign, Oct. 2009, 70–71

If you have a three-day emergency supplies kit, does it contain nutrient-dense foods? During perilous times, your body would especially need adequate nutrition. As a registered dietitian with a master’s degree in nutrition, I have developed a simple, healthy emergency meal plan for our family. The items should be rotated regularly for best results.

My minimum calorie goal for the three daily meals is 1,200 to 1,500, with 60 to 72 grams of protein and approximately 40 grams of fat, a combination that enhances satiety. The ingredients for each meal plan are simple:

I had never given much thought to nutrient dense foods in my 72 hour kit, I’ve always been more concerned with just having food, and cheap food to boot. But think, during a disaster you could be exerting yourself physically and making sure your body can cope with these exertions is important. Your body needs protein to rebuild its muscles after exercise. Just something to think about.

Meal replacements and supplements. Include shelf-stable protein drinks, instant powdered breakfast drinks, powdered milk, and energy bars. You may want to use more than one type. Each should provide 250 calories or more. Look carefully at the labels; snack or cereal bars are not as high in calories and protein.

The main reason I like the idea of protein drinks is for space and weight. Think how much lighter my pack would be if it just consisted of powdered mixes. Its good to know that maybe the cereal bars aren’t what we are looking for. You aren’t necessarily looking at calories as much as you are protein content. The higher the grams of protein the better for the bar. While my kids eat clif bars like crazy, I don’t know how well they would like protein drinks. Although they love smoothies, so maybe I could focus on getting fruit flavored varieties and mixing the water with powdered milk first and THEN the protein powder just to make it more palatable for them. The older they get though, the less taste will be an issue. And with all children, when they get hungry, they will eat.

Dried fruit. Raisins and other dried fruits are good.

Raisins are easy and my kids love them. I would love to find dried fruits in little snack size packages—not the boxes, but in little pouches. Does anyone know where to find those?

Peanut butter. This is a great shelf-stable source of protein. If you have peanut allergies, you could substitute it with another nut butter or small bag of nuts. Or find other shelf-stable protein foods.

Now, peanut butter I’ve got. I buy them in the small 18oz sizes and we have one in each pack, although that might be overkill. My kids eat PB by the spoonful, so I’m not worried about that being an issue.

Crackers. Include soda crackers or other crackers, preferably whole grain. You could also include granola if you won’t be using peanut butter to spread on crackers.

We also have saltine crackers in our packs. These crackers are easy to rotate because we eat them by the buckets when we are sick.

Drinking water. Ideally you should have about two quarts or almost two liters of water for each person to consume each day. Store what you can comfortably carry in your emergency bag, and add a portable water purifier so you can use available water sources.

So for one person you would want to have 6 quarts or 6 liters for the whole 72 hour kit. That’s a lot to carry. Mountain Man was happy to hear her suggestion of water purifying sources. We live by a major river and several lakes, and he doesn’t understand why I want him to carry 16 liters of water around in a pack. So I will be repacking our packs with Een’s suggestion of enough water we can comfortably carry and then a purifying system. Mountain Man has a system for backpacking but we generally keep that with our camping gear and it would be nice to have one JUST for our 72 hour kits, so if we had to really run, we could grab our kits and not worry about rifling through our camping gear to find the purifier.

I think I’ll look into the different types of purifiers and do a review post on them. I don’t know much about them, but I'd like to find which one would work for our family.

Utensils. Include one cup with a lid (to be used as a shaker for mixing powdered meal replacements) and a butter knife.

So this is something else I need to look for. Shaker cups with lids for the protein drinks—one for each person. Cuts down on the amount of utensils by using this meal plan too.

A sample meal plan for one person for three days would include nine meal replacements plus 1½ cups or a 12-ounce bag of dried fruit, peanut butter to provide at least six two-tablespoon servings, and about 40 saltine crackers or another cracker equivalent.

I love that Een laid out a meal plan for one person. So for four people (my family) I would need 36 meal replacements, plus 6 cups of dried fruit or 48 oz, 48 Tablespoons or 3 cups of PB (that doesn’t seem right? maybe my tablespoons are larger than others) and 160 crackers. Or one package of saltines/per person.

Calculate the food amounts needed for your family and round to the nearest convenient product size that is commercially available, taking care not to round down too much.

These emergency kits are easy to assemble with readily available items. The meal replacements are nutrient dense and fortified with vitamins and minerals so you can reach or approach nutritional adequacy and meet special dietary needs. They don’t need to be heated, and you can easily store everything in a moderate-size duffle bag or backpack. Best of all is the peace of mind in knowing you’ve prepared for your nutritional needs should an emergency evacuation ever occur.

I think I’m going to redo my 72 hour kit. I’ll have to do it slowly because protein drinks and bars aren’t cheap---but I’m excited to have this goal because I think it will be a space saver, and I’ll know that we’re getting the right nutrition. Not to mention this eliminates the need to have a stove or something to cook with.

What are your thoughts about 72 hour kit nutrition?

Tuesday, October 20, 2009

Tuesday

Every Tuesday, we post specific items you should gather in order to supplement your 72-hour kit, your 3-month supply, and your longer-term storage. If you are new to our blog, don't worry! You won't be left behind. Just start up where we are and follow along. You will eventually have everything completed! Once the 72-hour kit is complete, we'll be putting together emergency car kits again (week by week). Once those are done, we'll gather the 72-hour kits again. So don't worry, just jump on in and join us where we are today!

This week for your 72-hour kits, add some candles, matches, and candle holders if you need them (can you imagine actually having candles and matches, but having no way to actually secure a candle to make it stand upright? That would be maddening). Anyway, candles are great to use for just sitting around at night, and if you don't want to be using up your flashlight batteries (if you don't have a wind-up flashlight). If you do have those nifty wind-up flashlights, you may not need candles, but you certainly need matches. Consider buying waterproof ones, or waterproof them yourself by dipping the tips in wax.

How is your three-month supply coming along? Don't forget to store water! You should have at least two weeks' worth of water in your home. Click here to read Abbie's post about how to store water in plastic bottles.

This month for our longer term storage, we are gathering "other" items (see right sidebar for details). I'm stocking up on pasta. What are you gathering?

Monday, October 19, 2009

Motivational Monday


President Spencer W Kimball said:

"Are you prepared for and protected against death, illness, a long-continuing, crippling illness of the breadwinner? How long can you go if the income stops? What are your reserves? How long could you make your many payments on home, car, implements, appliances? … The first reaction is: We just cannot do it. We can hardly get by using every cent of income monthly. … If you can hardly get by when you are earning increasingly, well employed, well, productive, young, then how can you meet emergencies with employment curtailed, illness and other unlooked-for problems arising? You must not spend all you make. Money must be put aside for missions and for schooling for your children. They can assume responsibilities and take little jobs whereby they can also help to raise these funds and instead of spending those little accumulations, they will save them for these great purposes. It may mean that the parents of today will go without many things that they would like, but tomorrow will come the harvest."


“Chapter 11: Provident Living: Applying Principles of Self-Reliance and Preparedness,” Teachings of Presidents of the Church: Spencer W. Kimball, (2006),114–23

Friday, October 16, 2009

Food Storage Friday: Soft Pretzels

Brittany here. My camera is now working, but I only have half the pics for this recipe . . . so once again, you'll have to use your imagination for a bit.


These soft pretzels are time-intensive, so they would make an excellent family activity on a cold, rainy day when you're cooped up inside. They taste terrific, too. I would strongly recommend your reading the entire recipe before beginning it because there's considerable preparation needed--boiling water ready, paper towels ready to drain them on, etc.

What you'll need: flour, yeast, milk (reconstituted powdered milk), sugar, oil (I used canola), salt, water, egg white (if rotating), coarse salt or poppy seed or sesame seed


1. Heat your oven to 475 degrees.

2. Mix 1 1/2 c. flour and the yeast together in a large bowl and put it aside.


NOTE: I just used all-purpose flour, which is also a good thing to have in your food storage besides wheat. The recipe says you can substitute 1 1/2 c. whole wheat flour for 1 1/2 c. of the flour you stir in later. I am sure that the wheat would give the pretzels an additionally nice nutty flavor.


3. Heat and stir the milk, sugar, oil, and 1 t. salt just until warm. Add milk mixture to flour mix.

4. Beat in an electric mixer on low for 30 seconds, making sure flour is all incorporated. Beat on high for about three minutes and then add the rest of the flour. Either knead by hand at this point until dough is nice and springy or use your Kitchenaid or Bosch.

5. Let the dough rise until double, or at least an hour.

6. When it is risen, punch it down and let it rest for about 10 minutes on floured surface. Grease two baking sheets and put them aside.


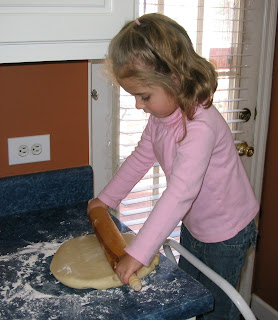
7. Roll dough into a 12x10-inch rectangle (I used my pizza cutter). Having a helper is handy.


8. Next, cut the rectangle into twenty 1/2-inch strips. I don't think I actually did twenty--I just cut out as many as I could from the rectangle/circle I made.


9. Carefully stretch each strip into a rope about 16 inches long and shape into a pretzel (see picture below for help with the pretzel shape).


10. Place pretzels on baking sheets and bake at 475 for 4 minutes. Remove from oven and reduce oven temperature to 350.


11. Meanwhile, in a large pot dissolve 2 tablespoons salt in water (about 3 quarts is what the recipe says--I just filled the pot up about 2/3 of the way) and bring to a boil. When it comes to a boil, reduce it down to simmer.

12. Lower pretzels, 4-5 at a time, into the water and let them simmer for 2 minutes, turning over once.

13. Remove the pretzels from the water and put them on paper towels (or regular towels--whatever you have handy!) for just a few seconds or they'll start sticking to the paper towel.

14. Place the pretzels on the greased baking sheets.

15. Mix 1 egg white and 1 T. water together in bowl. If you're using shelf-only items, just skip the egg white. Brush each pretzel. Sprinkle with salt or whatever you have. I didn't use anything 'cuz I'm just a rebel like that.

16. Bake the pretzels in the 350-degree oven for 20-25 minutes or until golden brown.

17. Enjoy!


Soft Pretzels
(recipe from Better Homes and Gardens Complete Book of Baking)

Ingredients:

4 to 4 1/2 c. flour
1 package active dry yeast (2 1/4 t .)
1 1/2 c. milk
1/4 c. sugar
2 T. cooking oil (I used canola)
1 t. salt
2 T. salt (separate use)
3 qts. boiling water
1 egg white (if rotating)
1 T. water
sesame seed, poppy seed, or coarse salt

1. Heat your oven to 475 degrees.

2. Mix 1 1/2 c. flour and the yeast together in a large bowl and put it aside.

3. Heat and stir the milk, sugar, oil, and 1 t. salt just until warm. Add milk mixture to flour mix.

4. Beat in an electric mixer on low for 30 seconds, making sure flour is all incorporated. Beat on high for about three minutes and then add the rest of the flour. Either knead by hand at this point until dough is nice and springy or use your Kitchenaid or Bosch.

5. Let the dough rise until double, or at least an hour.

6. When it is risen, punch it down and let it rest for about 10 minutes on floured surface. Grease two baking sheets and put them aside.

7. Roll dough into a 12x10-inch rectangle using a pizza cutter.

8. Next, cut the rectangle into twenty 1/2-inch strips (or however many you can).

9. Carefully stretch each strip into a rope about 16 inches long and shape into a pretzel.

10. Place pretzels on baking sheets and bake at 475 for 4 minutes. Remove from oven and reduce oven temperature to 350.

11. Meanwhile, in a large pot dissolve 2 tablespoons salt in water and bring to a boil. When it comes to a boil, reduce it down to simmer.

12. Lower pretzels, 4-5 at a time, into the water and let them simmer for 2 minutes, turning over once.

13. Remove the pretzels from the water and put them on paper towels for just a few seconds or they'll start sticking to the paper towel.

14. Place the pretzels on the greased baking sheets.

15. Mix 1 egg white and 1 T. water together in bowl. If you're using shelf-only items, just skip the egg white. Brush each pretzel. Sprinkle with salt or whatever you have.

16. Bake the pretzels in the 350-degree oven for 20-25 minutes or until golden brown.

17. Enjoy!

Thursday, October 15, 2009

Basic Cooking Skills: Quick Chicken Noodle Soup

Every other Thursday we will post about different basic cooking skills. Knowing how to prepare meals from scratch is a very important step in becoming self-reliant, which in turn is a crucial component of being prepared. Being able to cook meals for your family will give you confidence, more family togetherness time, and lower your food budget=more money for food storage! If you have a basic cooking skill you'd like to learn, email us! These meals contain perishable food items as this is a different series than our food storage recipes.


It's starting to get colder and soup is starting to sound better and better! This chicken noodle soup is quick and easy (just like the title says) and is great to make for your sick family and friends, or have just when you want something warm.


Ingredients: cooked chicken, carrots, celery, onion, chicken bouillon or chicken stock, cream of chicken soup, noodles and basil.


Cook your chicken first. I used this method talked about in weeks prior, and just cut it into cubes instead of shredding it. Peel your carrots (here's another way to cook full size carrots deliciously) and chop your celery and onion. I think Rachael Ray's idea of a garbage bowl on the counter is great. Less time spent shuffling back and forth to the garbage, and less mess on the floor from shuffling back and forth. Also, if you have a compost pile, the bowl is easily taken outside to dump.


Plop all your chopped veggies and the chicken bouillon in the pot and add water.


Bring to a boil. Reduce heat and simmer for 15-20 minutes until the veggies are tender.


At this point, add the cooked chicken


cream of chicken soup and the seasonings.


Now, the original recipe calls for some fancy refrigerated or frozen noodles that you defrost and add. But I never have those on hand--but I always have pasta. I used fettuccine today and just chopped it up into smaller pieces so it would be more manageable to eat.


Add the noodles, and frozen peas right now if you want. Cook for an additional 5 minutes, until the pasta is al dente.


Dish some up to take to a friend in need.


And save the rest for your family.


Slurp.


Quick Chicken Noodle Soup
Favorites Cookbook

4 chicken breast, cooked and cubed
5 carrots, sliced
1 stalk celery, sliced
1 onion, chopped
2 quarts water
4 chicken bouillon cubes (or 4 tsp chicken bouillon granules)

1 (10 3/4-oz) can cream of chicken soup
1 tsp basil
pepper to taste
1 cup frozen peas (optional)
5-6 oz of pasta

Boil veggies, bouillon and water together for 15-20 minutes. Add cut up chicken. Add cream of chicken soup, basil, pepper and bring to a boil again before adding pasta and peas. Cook for an additional 5 minutes.