-->

Monday, October 31, 2011

Motivational Monday

It is right to work. Every man and woman and child should work. Even little children should learn how to share, to help do the housework and the yardwork, to plant gardens, to plant trees, to pick fruit, and to do everything that needs to be done, because that makes strong characters out of them and builds their faith and character.
We want you parents to create work for your children. Insist on them learning their lessons in school. Do not let them play all the time. There is a time for play, there is a time to work, and there is a time to study. Be sure your children grow up like you know they ought to grow.

“Chapter 11: Provident Living: Applying Principles of Self-Reliance and Preparedness,” Teachings of Presidents of the Church: Spencer W. Kimball, (2006),114–23

Friday, October 28, 2011

FSF from the archives: Hummus

This is absolutely my favorite hummus recipe.  Abbie shared the recipe a few years ago, and I'm sharing it again because it should not be forgotten!  I usually make this hummus at least once a month.  It's in our food storage recipes  page as "Hummus 2" (since it's the second hummus recipe we shared here on the blog).

Enjoy!


Hummus

1/4-1/2 tsp garlic powder
1/2 tsp salt
1 can chickpeas, drained
1 1/2 Tbsp lemon juice
3 Tbsp olive oil
1 Tbsp water
1/2 tsp soy sauce
3/4 tsp cumin

Mix all ingredients in a food processor and process for 3-5 minutes until mixture is smooth and light, scraping down sides of bowl 2-3 times. You can also add some garlic if you want to.

This is great as a dip or on wraps and sandwiches. Makes about one cup, maybe a little more. Doubles well. Freezes well. If using dried garbanzo beans: cook until soft, then measure out 1 2/3 cup of beans to equal one can.


Thursday, October 27, 2011

Unconventional Food Storage


My Mom lives in a normal sized city, not the country, but in the back of her yard, she has a chicken coop and some chickens (which are allowed by the city).  I think of this as an unconventional method of food storage.  Kind of like gardening, but taking it up a notch.

What are some other types of unconventional food storage?  Do you have chickens or other animals? Have you ever considered getting them? 

I have to admit that while I'd like some chicken some day, what I really dream about is having a little goat. Goat milk anyone?

Monday, October 24, 2011

Motivational Monday

On a daily basis we witness widely fluctuating inflation; wars; interpersonal conflicts; national disasters; variances in weather conditions; innumerable forces of immorality, crime, and violence; attacks and pressures on the family and individuals; technological advances that make occupations obsolete; and so on. The need for preparation is abundantly clear. The great blessing of being prepared gives us freedom from fear, as guaranteed to us by the Lord in the Doctrine and Covenants: “If ye are prepared ye shall not fear” (D&C 38:30).


Elder L. Tom Perry,
Quorum of the Twelve Apostles
"If Ye Are Prepared Ye Shall Not Fear"

Friday, October 21, 2011

Food Storage Friday: Cookie Dough "Hummus"


Yes, you read that right: Today I made cookie dough dip, or, Cookie Dough "Hummus", as I think I'll call it.


I found the recipe here on this healthy dessert blog, and I only tweaked it a tiny bit, so mostly this is her recipe that I'm sharing with you.


First though, let me clarify: despite the fact that this comes from a healthy dessert blog, and it has chickpeas in it, I would not categorize this as "healthy".  It is not low fat, and it has 1/3 cup of sugar.  Also, while you can eat it plain, it is recommended that you dip food into it, like cookies and crackers, which are rarely "healthy" either. So, this is definitely a "treat" and I do not recommend eating as much of it as you would normal hummus.  


Secondly, this is basically perfect for when you feel like eating raw cookie dough.  For me, that's pretty much every day!  So this is a perfect recipe for your sweet tooth.  I'll admit, I was nervous to try this at first because.... well, chickpeas in a sugary dessert?  Didn't sound too appealing.  But I can't even stress how wrong I was!  My kids even love it!  I'll definitely be adding this treat to our menu plan for our three-month supply of food.  Please try it, it's soooo good.


Here we go!
The ingredients: baking soda (for flavor), oats, chickpeas, peanut butter, vanilla, salt, brown sugar, chocolate chips, prepared powdered milk (not shown, whoops!)

Combine all your ingredients in a food processor (or in my case, Magic Bullet):

Combine until smooth, then stir in your chocolate chips:

Cookie dough on a spoon.... YUM!


Cookie Dough Hummus


1 1/2 cups chickpeas (one can, drained)
1/8 plus 1/16 tsp salt (basically, fill a 1/4 tsp about 75% full)
tiny bit more than 1/8 tsp baking soda (this is for flavor)
2 tsp vanilla
1/4 cup peanut butter (you could use any sort of nut butter: almond, peanut, etc)
1/4 cup prepared powdered milk (liquid form)
1/3 cup brown sugar
3 Tbsp oats
1/3 cup chocolate chips


Combine all your ingredients except chocolate chips into a food processor.  I used my magic bullet... it was pretty full but it worked!  Once you have a smooth consistency, stir in your chocolate chips.  Eat plain (yum!) or dip in cookies or pretty much anything you want!


Also, I recommend you visiting the original site this came from, and checking out some of the comments (there are over 300!). Some people have great suggestions for things to add, and the blog author also answers a lot of questions about the recipe.  She even has a link in her post to a sugar-free version of this recipe (it include soaking dates or something like that).  I love this recipe and would love to hear what you think about it!

Thursday, October 20, 2011

"Real Life" Emergency Series - Miami, FL

We are continuing our guest post series sharing your stories about getting through emergency situations.  Today, we're sharing Lisa's story from Florida.

(Do you have an emergency story you'd like to share?  It can be short or something longer... we'd love to share it!  Please email it to us at safelygatheredin (at) gmail.com).


Here is Lisa's story:


I grew up in Miami, FL.  I never knew what preparing ahead, 72hrs kits, or grab n go kits were.  I did know that  every summer we'd have hurricanes and there were things you just did when one was spotted coming our way.  We always filled up the tub with water, brought everything in from outside, and made sure we had plenty of flashlights, batteries, candles, and the radio was working. We also moved our boat to a safe anchorage prior to each storm.  Perhaps living in this scenario prepared me a bit and made me come to where I am today, I don't know. 


On Aug. 23, 1992 I was living in Orlando, FL after having my forth child a few months earlier.  We heard that a hurricane was going to hit Miami.  My parents still lived in my family home in the Kendall area. After we heard that the roads were open, my husband packed up the car and left early in the morning of the 24th to go down and check on my parents.  We knew they were having company stay with them and knew by the predictions that this would be a big one.  When my husband arrived, nothing prepared him for what he found.  


He arrived shortly after the storm hit.  He couldn't find the roads and it took him a long time to find our home.  He found our home virtually destroyed. There was almost no roof at all left and an entire wall of the back of the house was missing and no windows were left intact.  A finger tornado had made a path of destruction through my neighborhood destroying every other home on my street. Luckily my parents and their friends were alive and only suffered glass cuts, none life threatening.  They survived by all of them barricading themselves in one room on the farthest end of the house away from the wind.  My parents were travelers and had many valuable things that were destroyed.  


I went down with the children several days later to help.  We had to lay everything out to dry in humid and sometimes raining weather.  We went through many bottles of bleach cleaning the mildew that quickly formed on everything.  Many pictures were taken to document the extent of the damage and many reports and forms were filed with the insurance company.  Most everything wasn't covered because we didn't have proof of all the items we owned. We were running the generator during the day and night and my husband and father spent many hours hunting down gasoline and water.  There were long lines everywhere waiting to get water and gasoline.  Night times were spent with rotating watches to watch for the frequent looters that were reported in the area.  We were among the lucky ones that had cash on hand to purchase plywood and gasoline. 


The story goes on and on actually impacting all of us this many years later and it especially took a toll on my mother, who would never fully recover emotionally from it.  I have learned several things from this hurricane and more things from the 3 other direct hits our family took living in Central Florida.  


First, I learned to have a some important things on hand as a priority, like a generator, gasoline, water, cell phone or walkie talkies, a gun or two with ammo, and cash. 


Second, I learned how valuable a gas grill is to cook all the food that starts spoiling immediately from you refrigerator.   After one hurricane,  I learned that I lost all my frozen fruit in my freezer because I didn't have enough generator power to power fans and all my appliances like I wanted, so we don't have my entire fruit supply in one "basket" anymore, so to speak.  


I also learned that my dog won't go to the bathroom inside the house no matter what I did, so I had to go outside in the storm with an umbrella with her-which, by the way is useless.  


I learned I need a full rainsuit in  my supply kit.  


I have also learned that I am glad that I have had multiple experiences, it has prepared me for a future disaster better than the last and helped me to educate those around me to be a little more prepared than I was the first time.

Wednesday, October 19, 2011

Revamping the Car Kit

One of the things I am learning about food storage and emergency preparedness, is how easy it is to "complete" something, like put together a car kit and then cross it off your list and forget about it.  That doesn't work because food storage and emergency preparedness are two subjects in the school of life that are never done. To be prepared one always has to be thinking about, rotating, and prepping your "completed" projects.  It's something I am not very good at, but I'm learning as I go.

In January, I put together a list of food storage/emergency preparedness goals that I wanted to complete this year. Revamping my car kit may be the only one I cross off the list this year!


I started by cleaning out my trunk opening up my kit and taking inventory of what I had. What I had was outdated jacket (just one), one not very fresh granola bar, and a few other things.  My car kit was in desperate need of repair. I printed off this list of Emergency Car Kit supplies and went through each thing that I needed. It's definitely important to cater your car kit to your individual family as well as to your specific area.
 
I'm not going to lie, the most important thing in my car kit, is definitely the snacks. We use those for every day emergencies all the time.  Back in April we did a reader question asking about different kinds of snacks for the car kit. A couple of you suggested nuts, which I thought was a great idea! Nuts are healthy, plus they have a great storage life. Another snack that I also put in are the crunchy type granola bars. Because I don't like them, so I'm less likely to sneak and eat them. Which is good because my "I'm really hungry, what's there to eat" emergencies tend to happen more often than actual "I forgot snacks for my kids" emergencies.


New bandaids went into the first aid kit (those always run out), new snacks, new package of wipes (which I use for just about everything), a little cash in small bills, and so on.


I used to keep my car kit in an open bucket, but I noticed that dirt got into everything and I didn't like that, so I borrowed Hannah's idea and found a lidded tub thing.  Another great idea would be an old backpack.


It's all set and stashed away until I need it again.  And I'm resolved to not wait this long to do a full restocking of my car kit.


What about you? When was the last time you revamped your car kit? What was the most outdated thing you found?

I had a 2T jacket for my almost five year old. That's not going to help us!


Tuesday, October 18, 2011

Food Storage Tuesday

Every Tuesday, we post specific items you should gather in order to supplement your 72-hour kit, your three-month supply, and your longer term storage.  If you are new to our blog, don't worry!  You won't be left behind.  Just start up where we are and follow along.  You will eventually have everything completed.  Once the 72-hour kit is complete, we'll be putting together emergency car kits again (week by week).  Once those are done, we'll gather the 72-hour kits again.  So don't worry, just jump on in and join us where we are today!


This week for your 72-hour kits, add some light sticks (glow sticks).  These can be used in a handful of ways during an emergency.  They are an added source of light, they are waterproof, and are extremely safe to use.  Kids love them!  You can get light sticks that last anywhere from 5 to 24 hours.  Shop around and find what works best for your family.  I personally bought a 10-pack of light sticks, and spread them out in the packs (2 in each pack, with the extras in the big pack).


How's your three-month supply going?  Having a hard time coming up with recipes using only non-perishables?  Check out our extensive food storage recipes page.


This month for our longer-term storage, we're gathering "other" items.  Yeast, honey, flour, sugar, brown sugar, powdered eggs (if you like them), etc.

Monday, October 17, 2011

Motivational Monday

“In reviewing the Lord’s counsel to us on the importance of preparedness, I am impressed with the plainness of the message. The Savior made it clear that we cannot place sufficient oil in our preparedness lamps by simply avoiding evil. We must also be anxiously engaged in a positive program of preparation. The Lord will not translate one’s good hopes and desires and intentions into works. Each of us must do that for himself.”

Spencer W. Kimball, The Miracle of Forgiveness, Salt Lake City: Bookcraft, 1969, p. 8

Friday, October 14, 2011

FSF from the archives: Pumpkin Granola

In the three years that Hannah and I have been writing this blog, we've had lots of great recipes come through our Food Storage Friday column. This fall we're going to feature one of our favorites from the archives every other week. This week I'm sharing Aleasha's Pumpkin Granola which was originally published on October 22 of last year. I love pumpkin and I love fall, and I love granola-and this is a good one!

I came across this granola recipe and had to try it out. Quite delicious and perfect for fall!


Ingredients: oats, puffed rice cereal, salt, brown sugar, applesauce, pumpkin puree, maple syrup, vanilla, chopped nuts, dried fruit of choice, cinnamon, ginger, allspice and nutmeg


Pour pumpkin, applesauce, brown sugar, maple syrup, vanilla, spices and salt into bowl and mix well
Combine oats and rice cereal in large bowl, pour wet ingredients onto dry and mix well. Spread onto a cookie sheet in an even layer. Bake at 325 for 25-30 minutes then turn the granola with a large wide spatula. Add nuts and bake for an additional 15 minutes. Add dried fruit when granola is cooled.


Pumpkin Granola
original recipe from bakingbites.com

3 1/2 cups rolled oats
2 1/2 cups puffed rice cereal
1 Tbs Cinnamon
1 tsp ground Ginger
1/2 tsp Nutmeg
1/2 tsp allspice
3/4 cup brown sugar
1/2 cup pumpkin puree
1/4 cup applesauce
1/4 cup Maple syrup
1 tsp Vanilla
1 1/2 cup chopped nuts
1 cup dried fruit- I used Craisins

Bake at 325 for 25-30 minutes, flip, add nuts and bake for additional 15 minutes. Let cool on cookie sheet. Enjoy!


Thursday, October 13, 2011

"Real Life" Emergency Series - Joplin, MO


We are continuing our guest post series sharing your stories about getting through emergency situations.  Today, we're sharing Victoria's story from Joplin, MO.  Thanks so much for sharing, Victoria!
(Do you have an emergency story you'd like to share?  It can be short or something longer... we'd love to share it!  Please email it to us at safelygatheredin (at) gmail.com).

Advice from Joplin:


As someone who has been involved with the tornado that hit Joplin, MO, something that people don't think about is taking photos of their homes to document what is inside for insurance purposes. My sister-in-law lost everything but is still alive which is the important thing. However, trying to fill out the insurance forms for everything she lost is a nightmare.

The other important thing to know is basic first aid and have those supplies in your car and know how to use them. When you're knee high in nothing but rubble, it's easy to get cut and hurt.

Make sure you have a family plan in case you get separated. Know where to go in case your home is no longer there. Our Stake President (religious leader) was separated from his daughters for a few hours and he said those were the longest hours of his life. Make sure your children can say, “My mom’s name is ____”. My father works in the hospital and they have a lot of children who couldn’t tell them their parents’ names. They just knew them as “mom” and “dad”. He’s sedated many mothers who were over come with grief because of missing children.

There isn't anyway to emotionally prepare for something like what happened in Joplin. I wasn't prepared to comfort people who lost everything, but I cry with them every night. I wasn't prepared to take in homeless people that night, but I did anyway. However, I was prepared to give them basic things that they needed; toothbrushes, deodorant, shampoo, etc. Making sure your home is fully stocked with basic things is very important. You might not need 10 toothbrushes, but an unexpected houseguest might. People tend to focus on food storage and stocking your home with food but forget to stock up on non-food items.

The best way to prepare for a disaster like this is to ask yourself what would happen if your home was gone? Do you have enough insurance to cover your loss and help you start over? Do you have family or friends close by to go to if you become homeless? Do you have 72 hr kits in a place where you can grab and go? What if you lost power for a week or more? Do you have a way to heat your home in the winter if you don’t have power? What if the stores were gone and you had to survive on what’s in your pantry?

The most important thing to do is to become prepared and then teach everyone you know how to become prepared as well. Make sure that the people you would have to rely on in emergencies are prepared.

Don't ever second guess those little promptings in the middle of a crisis. That little voice might very well save your life. So many people were prompted to do something that they normally wouldn't do and it saved their lives. God will protect us if we listen and obey immediately.

Wednesday, October 12, 2011

Under-the-bed storage

Hannah here!

A couple weeks ago I mentioned that I would be sharing a little more in-depth about how I set up my longer-term storage under my bed.  I'll warn you, it's not too thrilling - but if I can even give one person some good ideas, it'll be worth it! :)

First, I gathered all my #10 cans of food.  I prefer #10 cans for my longer-term storage because I live in Florida, and the cans keep the pests out!  I sometimes buy my food already canned up, or in the past I have brought food to my mother-in-law's house and used the huge canner that we borrowed from church (we've done flour, beans, oats, sugar, powdered milk, hot cocoa mix).

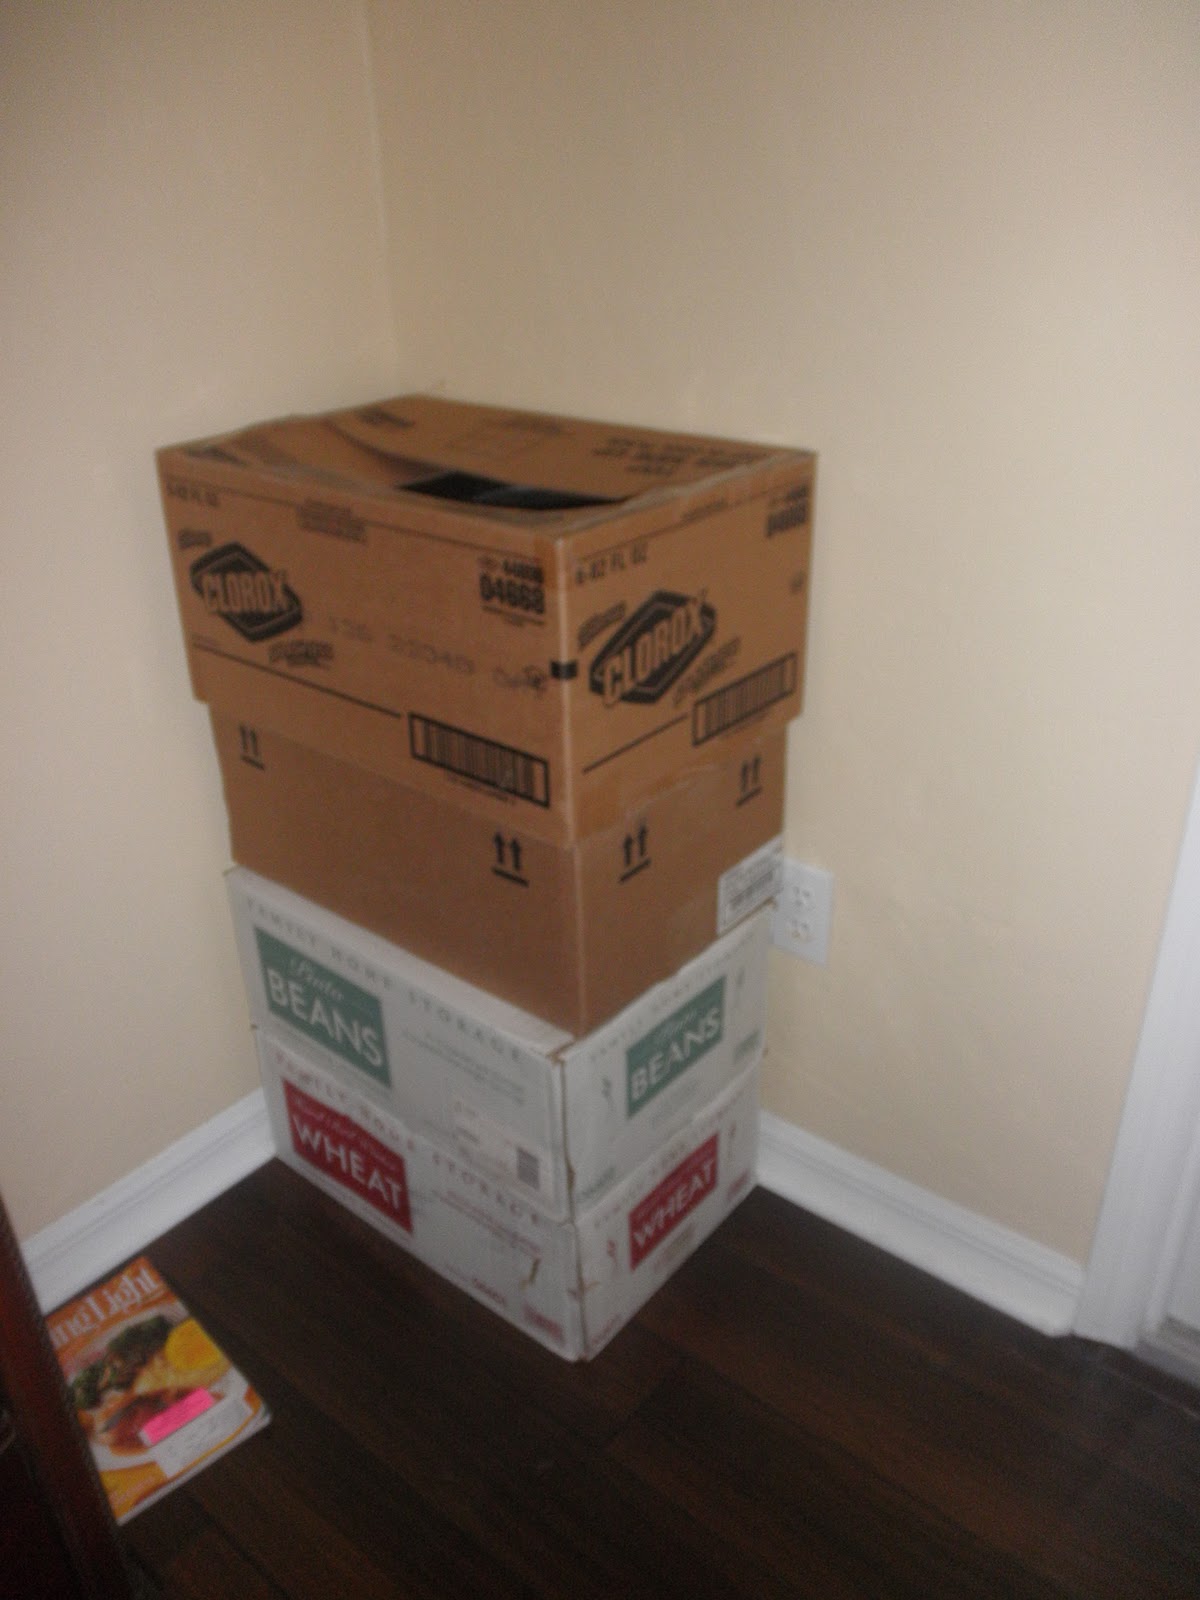
For a few months, the corner of my bedroom looked like this:

I also had random cans around the house that I gathered together:

We bought bed risers at Walmart for around $7, I think (for the 4-pack).  They are about 7 inches tall and seem sturdy.  I put a square piece of batting under each one so they wouldn't scratch the floors. :)  And, yes, under my bed it's very dusty and messy and just generally unkempt.  Ugh. (I guess the excuse "no one sees under there" doesn't apply to me!)

At first, it made me a little nervous to have laminate floors in my bedroom because I imagined that all those cans would scratch up the floors as I put them underneath or took them out.  Finally, I came up with a great solution (you'll see below)!

I used a permanent marker and labeled the cans all the way around the top so that I would be able to read what is in them, no matter what angle they are at under my bed.

(Side note: #10 cans are the perfect stool height for a two-year-old!)

 First, I slid all the boxes under the bed.  I felt pretty good about where they were, until I discovered that I had a good 8-10 inches of wasted space at the top of the bed!  At first I just figured that I would fill that space with just a line of #10 cans if I needed to, but then I realized that there was just enough space between the risers to push all the boxes up.  So, that's what I did!  They are pretty wedged in there, but I can get to them if I need to.

The boxes pushed up, all the way to the wall:

Next, I found a towel we never use and folded it in half long-wise (this is my solution for not scratching the floors).  This gave me just enough space to line up two rows of #10 cans.  Again, since I have the cans labeled all the way around, I don't have to place them in any particular way.  I did keep groups of foods together, though.

 Once the rows were complete, I simply pushed them all under the bed on the towel.  It didn't matter how heavy they were, because they just slid right in!  They also slide right out by pulling on the end of the towel, so I am thinking that rotation will be a bit easier now that my food is easy to get to!

Halfway there!  As you can see, we have two table leaves under the bed as well, and those are staying for now.  They are also acting as a support for the middle leg of our bed, which didn't get a riser (they came in a 4-pack).

Next, I lined up all my rice on a second towel.  I have more rice than anything else, as you can see!

A couple seconds and a couple pushes later, they were under the bed, neat and orderly.  Easy to slide in and out.

Finally, I made a list of exactly what was under the bed.....

.....and I stuck it between the bed frame and the box spring.  If I ever add anything under the bed, or take anything out, I'll simply edit this list as needed.  I even have a pen in there so that there is no excuse not to keep it updated.

So there you have it - my simple way of organizing my longer-term storage under my bed.  I am hoping that I can even add a second stack of cans on top of the ones I have under there now (I am pretty sure there would be space for some cans, but not as many as the first layer because of the bed frame, box spring beams, etc.).  I am also hoping to get a bed skirt someday so that our bed doesn't look so funny on those risers. :)

This method (using towels to slide food) would probably not be as effective if you have carpet in your bedrooms, but it might be worth a shot, especially if you can get to the other side of your bed and pull the towel under the bed instead of pushing it (does that make sense?).  What about flattened cardboard boxes - would those slide very well on carpet, if there were cans of food on top of them?  I'm just trying to throw out some ideas here!  Has anyone found a good method for under-the-bed storage?  Let us know!

Tuesday, October 11, 2011

Food Storage Tuesday

Every Tuesday, we post specific items you should gather in order to supplement your 72-hour kit, your three-month supply, and your longer term storage.  If you are new to our blog, don't worry!  You won't be left behind.  Just start up where we are and follow along.  You will eventually have everything completed.  Once the 72-hour kit is complete, we'll be putting together emergency car kits again (week by week).  Once those are done, we'll gather the 72-hour kits again.  So don't worry, just jump on in and join us where we are today!


This week for your 72-hour kits, add some small entertainment items.  72 hour is three whole days... things would get pretty boring pretty fast if you were without power for three days, or if you were forced out of your home for three days.  Some decks of cards, small dice games, coloring books and crayons, etc.... don't forget something for yourself too, like a book of sudoku or crossword puzzles.


How's your three-month supply coming along?  Don't forget to stock up on things you love that are in season right now.  It's easier to find pumpkin on the shelves right now than it is during the Spring.  You could also plan to stock up on candy during the post-Halloween sales (if that's your thing... I personally stay away from the good candy because I have no self control!).    I do, however, plan to stock up on some hot apple cider mix!


We're still gathering "other" items for our longer-term storage this month.  I just found out (the hard way) that I'm out of yeast!  I thought I still had a whole other bag of it in my pantry, but it turns out that the bag I was using was that bag.  Don't you hate when that happens?  I also "need" to stock up on chocolate chips!

Monday, October 10, 2011

Motivational Monday

"We live in a most exciting and challenging period in human history. As technology sweeps through every facet of our lives, changes are occurring so rapidly that it can be difficult for us to keep our lives in balance. To maintain some semblance of stability in our lives, it is essential that we plan for our future. I believe it is time, and perhaps with some urgency, to review the counsel we have received in dealing with our personal and family preparedness. We want to be found with oil in our lamps sufficient to endure to the end."

Elder L. Tom Perry,
Quorum of the Twelve Apostles
"If Ye Are Prepared Ye Shall Not Fear"

Friday, October 7, 2011

Food Storage Friday: Chocolate Oatmeal Cluster Cookies

Food Storage Friday is BACK! For those of you who are new to Safely Gathered In, on Friday's we like to share a recipe that can be made with only shelf stable items. For example, using powdered milk instead of regular milk and so on. We'll be spotlighting some of our favorites from the archives as well as sharing new recipes.


These Chocolate Oatmeal Cluster cookies are ones I've wanted to make for the blog for a while, but the summer off has put it on the back burner. The original recipe is here and I found it via this blog. Don't you love how many recipes I find from healthy living blogs? That's because food storage is healthy!


Ingredients: oats, cocoa powder, sugar, olive oil, vanilla, salt, ground flax seed and water.

Flax seed and water is an egg substitute which you can read about here: Egg Substitution: Flax Seed. I used whole flax seeds which I "milled" in my blender. Basically, I just turned the blender on until the flax seeds were all ground into flour (flax flour). Then I stored the ground flax seed in a container in my fridge until I needed it.


The first thing you want to do is make your "egg." Mix your ground flax seed with the water and let it sit while you mix up everything else. You want it to sit for 3-4 minutes so it can get a gel-like texture.


Then get to work mixing up the dry ingredients. Add sugar to the oats.


Then the cocoa powder (the more you add the more "dark" the cookies are).


A little salt


Stir it all together until combined.


Next up the wet ingredients: the olive oil that is speckled with cocoa powder because I used the same measuring cup. (I don't have a dishwasher in my new place, so I'm very conscious about how many dishes I use!)


Vanilla


And finally, the flax "egg."


Mix all your wet ingredients together until well combined.


Now add your wet ingredients to your dry ingredients.


Mix, mix, mix.


Now cover, and store the dough in your fridge for several hours. This is why the pictures are so bad, I had to make the dough early in the morning (meaning, no natural light) so that they would be ready early enough in the day for lunches.


Oh look! Better pictures!

Drop the batter by teaspoons onto a cookie sheet (I use my little mini ice cream scooper thing, that you would never use for ice cream because it's so tiny).

And flatten them with a fork. This just makes more of a cookies shape, because they won't fall on their own.


Bake!


It reminds me of no-bake cookies, only you bake them! This makes a super dark chocolate cookie. They are a big hit with the dark chocolate lovers around here. A little too dark for my taste, but I am often out numbered when it comes to the grade of chocolate.


Chocolate Oatmeal Cluster Cookies
adapted from Kalyn's Kitchen

1 cup oats
1/2 cup sugar
1/4 cup cocoa powder
pinch of salt
1 1/2 tsp vanilla
1/4 cup olive oil
1 flax egg (1 Tbsp milled flax seed with 3 Tbsp water)

Combine the ground flax seed and 3 Tbsp water in a separate bowl. Mix and set aside. Mix dry ingredients in a bowl. Combine wet ingredients in a bowl. Mix all together. Cover and chill for several hours.

Scoop onto cookie sheet and flatten with a fork. Cook for 12 minutes at 350 degrees. Makes a dozen.


What about you? Dark chocolate or milk chocolate?