-->

Tuesday, January 31, 2012

Food Storage Tuesday

Every Tuesday, we post specific items you should gather in order to supplement your 72-hour kit, your three-month supply, and your longer term storage.  If you are new to our blog, don't worry!  You won't be left behind.  Just start up where we are and follow along.  You will eventually have everything completed.  Once the 72-hour kit is complete, we'll be putting together emergency car kits again (week by week).  Once those are done, we'll gather the 72-hour kits again.  So don't worry, just jump on in and join us where we are today!  


It's Tuesday again!  We're finally done gathering food for the 72-hour kits - I will do a post about what food I gathered soon.  We're still working on the 72-hour kits, and we're moving on to work gloves.  Pack a pair (or a couple pairs) in your kits.  It's impossible to know what kind of situation you would be in during an emergency, and what if you need to do some sort of manual labor (moving branches, building shelters, digging ditches, moving sandbags...)?  So, find a pair of work gloves that will work for you and your family, and pack a pair for anyone who may be doing work that would require them.

How's your three-month supply coming along?  Don't forget to rotate your food storage so that nothing expires.    If you don't eat "food storage food"  very often, at least try to make it a goal to eat one food storage meal every couple of weeks.  That way, you can be sure that your food storage meals are enjoyed by your family, and you are rotating through your non-perishables.  And, remember to replace the food you eat!

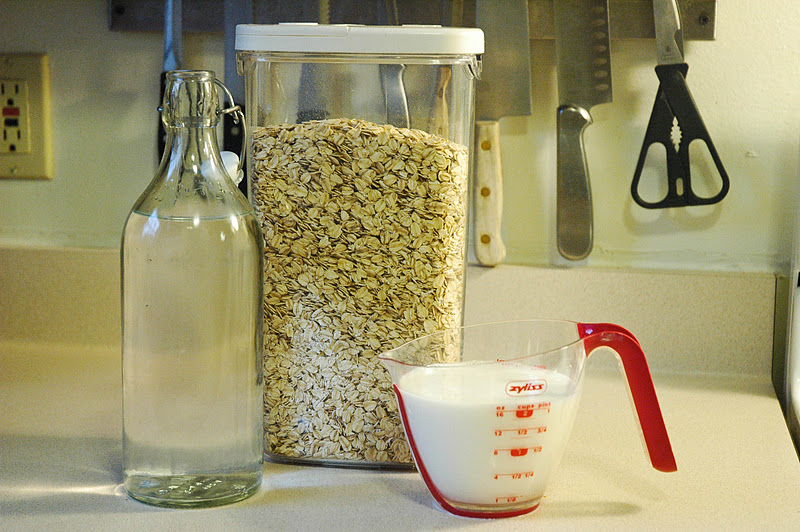
It's still January, and for our longer-term storage items we are gathering oats this month.  But in February we will be gathering beans, so feel free to start on that!

Monday, January 30, 2012

Motivational Monday

“I should like to address a few remarks to those who ask, ‘Do I share with my neighbors who have not followed the counsel? And what about the nonmembers who do not have a year’s supply? Do we have to share with them?’ No, we don’t have to share—we get to share! Let us not be concerned about silly thoughts of whether we would share or not. Of course we would share! What would Jesus do? I could not possibly eat food and see my neighbors starving. And if you starve after sharing, ‘greater love hath no man than this …’ (John 15:13.)

Vaughn J. Featherstone, “I Have a Question,” Ensign, Oct. 1976, 31–32

Friday, January 27, 2012

Food Storage Friday: Almond Butter

Almond butter! No more will I have to beg my mother-in-law to bring jars of you from Costco to me in her suitcase!  You are simple and quick to make! Ahh, self-reliance, how good you taste.


 Ingredients: almonds

Yep that's it.  Although you will need a food processor or a heavy duty blender.


 I'm using roasted and salted almonds. But you can use raw, some people prefer the taste of raw. I just happened to have the roasted kind because it's good for snacking.


 Put the almonds in the processor, with the knife blade attachment.


 Turn the processor on. It helps if you have an overeager 4 year old to help with this step.


 Let the processor run. You can already see that there is a layer at the bottom which has already passed the crumb stage and the oils from the almonds are being released.


 A few more minutes and it's clumping into a ball of almond dough.


 Just a brief note about my processor in case you're interested. This is the only one I've ever had, so I can't compare it to others, but it made quick work of the almond butter.

I've seen around the web, this taking about 15-17 minutes to process so I guess it depends on your machine.  Also, raw almonds will take a bit longer to process than roasted ones.

If you prefer the taste of roasted and you already have raw, just pop them in the oven or on the stove top to roast them for a bit (at a low temperature, stirring frequently).


 After only 3 minutes, at this point I stopped the processor and scraped down the sides.


 After 6 minutes:  my white balance is off on the camera so the almond butter didn't actually get yellower, but check out how smooth that is.


 Put it in a container and refrigerate.  After testing it of course.

Almond Butter

2 cups of almonds

Process in food processor until smooth, pausing every few minutes to scrape down the sides with a spatula.  Store in the fridge.

*********************************************
If you're feeling wild and crazy try this recipe:

4 Ingredient Dark Chocolate Almond Butter

Or if you prefer peanuts:

Classic Crunchy Peanut Butter

Have any of you made your own nut butter before? 
It was so simple I'm kicking myself for not doing it sooner!


Tuesday, January 24, 2012

Food Storage Tuesday

Every Tuesday, we post specific items you should gather in order to supplement your 72-hour kit, your three-month supply, and your longer term storage.  If you are new to our blog, don't worry!  You won't be left behind.  Just start up where we are and follow along.  You will eventually have everything completed.  Once the 72-hour kit is complete, we'll be putting together emergency car kits again (week by week).  Once those are done, we'll gather the 72-hour kits again.  So don't worry, just jump on in and join us where we are today!  


We are still working on food for our 72-hour kits - this is the final week I'll be working on food.  Next week, we'll move on to something else (we are almost done and will be moving on to emergency car kits!). You can read more about the 72-hour kits here.  How are your kits coming along?  If you are done with your food, go back and make sure you have everything we've collected so far (you can see our list in the middle column of our blog page, under "Current Ongoing Project").

How's your three-month supply coming along?  Make a food storage meal plan for those three months, then make your master shopping list.

We are still gathering oats for our longer-term storage.

Monday, January 23, 2012

Motivational Monday

"Those who structure their standard of living to allow a little surplus, control their circumstances. Those who spend a little more than they earn are controlled by their circumstances. They are in bondage”

President N. Eldon Tanner "Constancy Amid Change," Ensign, Nov. 1979, 81

Friday, January 20, 2012

FSF from the Archives: Chicken Tortilla Soup

Here's a great soup from our archives. Perfect for that chilly winter night.  Mountain Man made this for me for my birthday last weekend. It's my favorite!

 Originally posted March 20, 2009
Also of possible interest:
How To...Make Tortilla Crisps

We're nearing the end of 'soup season' which is a real bummer because of how easy soup is to whip up for dinner.


Today's meal, Chicken Tortilla Soup, is merely a drop in the pot and cook. Love those.


Ingredients: Tomato sauce, crushed tomatoes, corn, green chilies, canned chicken, garlic salt, oregano, sugar and chili powder (and water, not pictured)


Open and dump all your canned items into the pot.


Add the water


and sugar and spices


Open the canned chicken, drain and then shred with two forks. Add to pot.

Bring the soup to a boil, then lower the heat and simmer for 20 minutes or so.


Top with crispy tortilla strips (coming Wednesday) and serve. Delicious!


Chicken Tortilla Soup
adapted from Favorites

1-28oz can crushed tomatoes
2-8oz cans tomato sauce
1/2 tsp garlic salt
4 cups water
2 Tbsp sugar
3 tsp chili powder
1/2 tsp oregano
1-4oz can diced green chilies
1-13oz can chicken

Combine in a large pot. Bring to a boil. Lower heat and simmer for 20 minutes. Stuff your face.


Okay okay, here's a peek at the dang tortilla crisps


Great, now what am I going to post on Wednesday?

Thursday, January 19, 2012

Blog Tour - welcome to our blog!

We've been mentioned on some other blogs and websites recently and have some new readers (welcome!!).  So, Abs and I thought this would be a good time to do a little "blog tour" and show you around our site and everything we have to offer.  I hope it's helpful as you cruise our site and try to find good ideas for your food storage and emergency preparedness.


Here's our home page, obviously. :)  You can get to our home page by clicking "Home Page" in the top left corner, or by clicking on our "Safely Gathered In" title bar.


Next, we have an "About" button.  If you click directly on "About", you can read a bit about Abs and myself, and a little background about how and why we started this blog.  If you hover your mouse over the "About" button, more options also come up.  You can click on the "contact" link, which will bring you to our contact page, or if you click on "Columnists", you can read bios about some of our guest posters.  There is also an "Advertise" link there, but for some reason it's not working... I'll have to get on that! (please just email us if you are interested in advertising at this time).


 Next to the "About" button is our "Food Storage" tab.  If you hover your mouse over this tab, four options will come up.  You can go to our food storage recipes page (we have LOTS of food storage recipes, and all our recipes use 100% non-perishables only).  You can also click on "Three Month Supply", "Longer-term Storage", or "Water Storage" to read more information about any of those topics.  Those pages have links to dozens of articles that we have written about the various subjects.

 Next, the "Emergency Preparedness" tab.  You have two choices here: you can read about 72-hour kits, or emergency car kits.

 Our final tab on top is the "Resources" tab.  You can click on "Tutorials", which will take you to a page of all our great step-by-step tutorials, you can see our free printables, or you can click on "e-book" to read about our food storage e-book that we have compiled.

 Now let's talk about the sidebars.  First, near the top of the page on the far right, we have a search bar where you can search for keywords on topics you might be looking for.

 A little further down, you can grab our button to share on your own blogs/websites.  Next to that you can input your email address to subscribe to our blog.  This way, all our posts can be emailed to you directly every time we update the blog.

 If you scroll down a bit more, you'll see our ongoing projects.  We are always working on something, and we welcome you to join with us!  For our longer-term storage, we rotate what we are focused on gathering each month, so you can see what the current food is.  We are also constantly gathering either 72-hour kits or car kits, and every week we "assign" you something to gather for your own kit.  Right now we are gathering 72-hour kits, and we will be done pretty soon!  When we get to the end of the list, we'll start gathering emergency car kits week by week.  Then, back to the 72-hour kits, etc.  One step at a time!

 Finally, three more sidebar items: we have an e-book tab for quick and easy access to our e-book.  Underneath that you can see our blog archives and search by date.  Finally, on the far right, you can search for blog posts by topic.

We hope you will take some time to check out our food storage blog and we hope that you find some information that will be valuable as you plan your food storage and emergency preparedness!

Wednesday, January 18, 2012

How To....Make Creamy Oatmeal


Oatmeal is the perfect breakfast. It's inexpensive, filling and delicious.  Here's an easy way to cook oatmeal that your family will love.

Ingredients: regular oats, water and milk


Measure out your oats. I plan for 1/2 cup of oats per person. You could do 1/3 cup per person if you want. Just depends on how big you want your portions.  At this time, I'm making oatmeal for 4 people, so I measured in 2 cups of regular rolled oats.


Add the same amount of milk and water as you did oats.  So 2 cups of oats equals 2 cups of milk...


and 2 cups of water. 

So if you're making a single serving of oats, you would add 1/2 cup of oats, 1/2 cup of milk and 1/2 cup of water and so on.


Stir them all together and turn the stove on medium heat.


Let it cook.  Cooking it on medium takes a bit of time, but it produces really creamy oats.  I just stir every time I walk by the stove while I'm making lunches, setting the table, stuff like that.


The longer it cooks, the thicker it gets. And you will have to stir more frequently.  You don't want to leave the room while this is cooking because it can burn if you're not watching it. But at the same time, it isn't a 'sit and stare' kind of dish.


Keep stirring until your oatmeal is nice and thick and softly bubbling. It may look a bit wet, but as it sits off the heat it will thicken up.

This is what your pot should look like when you're done. The milk has made the oatmeal really creamy, almost as if it was cooked in cream. You should be able to scrape it off without much resistance though.


Portion it off into 4 bowls, or however servings you made.  If you notice I have one big oatmeal eater (the 4 year old, she can never get enough) a baby (small bowl on the right), and two normal size bowls.

Now comes the fun part: toppings!  Seriously you can put almost anything on oatmeal. My 7 year old even likes a bit of cocoa powder in her oatmeal sometimes. The sky's the limit here folks!


Enjoy!

Easy Creamy Oatmeal

2 cups regular rolled oats
2 cups milk (can use powdered)
2 cups water

Combine all ingredients in a pot and cook over medium heat stirring occasionally and more frequently as it gets thicker.  

When the oatmeal is nice and thick, take off the heat and portion into 4 bowls. As the oatmeal sits, it will get thicker.  Top with your favorite toppings!


What is your favorite food to put on oatmeal?

I love pumpkin seeds, almond butter, coconut flakes and bananas, yum!