-->

Tuesday, December 29, 2009

Preparedness saves lives

I know we're technically taking a break until next Monday, but I just couldn't pass up the opportunity to share this article with you.  A Nevada couple was stranded in their car for three days because of snow; thankfully, they were fine because their car was stocked with food, water, and warm clothes.


It's obvious that being prepared can save your life, but sometimes that's hard to remember when we are in the process of stocking up.  It's easy to get discouraged and/or bored with it all.


Click here to read the article - it's a great reminder as to why preparedness is essential.  Hurray for car kits! (fyi - we'll be starting to put together our car kits in just a few weeks - as soon as the 72-hour kits are done.  We gather a few items a week, so follow along!)

Tuesday, December 22, 2009

Vacation

We're going to be taking a small break from blogging for the next little while.  With Christmas swiftly approaching, we know that most of you aren't thinking about food storage right now, and to be honest, neither are we!  We both went out of town for the holidays and will be enjoying some time off with our families.

We may be posting a bit here and there over the next two weeks, but we'll be back full time in January.  So, as you sit down and write out your new year resolutions, don't forget to think about some food storage goals.  Abbie and I will be doing the same, and we'll share them with you when we get back.

We hope you all have a happy and safe Christmas.  Thanks for reading!

Hannah & Abbie (Abs)

Friday, December 18, 2009

Food Storage Friday: Creamy Tomato Soup

Aleasha here. And I LOVE this soup! I have to admit I should have used dried onions for this recipe, but I had just run out. So when rotating use these.


You will need salt, pepper, Italian seasoning, garlic, onion, 3 cans tomatoes, chicken broth and 1/2 can evaporated milk (not pictured)


Note- you can use whatever kind of tomatoes you have on hand. Use more tomatoes to make more soup.
Pour all tomato products on to a baking sheet with liquid. Add spices to taste. Add onion. I used 1 medium onion-if using dried add about 2 Tablespoons.
Give a good stir.
Pop it into the oven at 400 Degrees and let roast for 45 minutes to an hour. You want every thing to get super toasty!
After it is roasted, put into a food processor or blender until smooth. After this point if you want to put the soup through a sieve to make it more smooth you can. I usually do, but I forgot this time.
Now, pour back into the same pot, add the can of chicken broth and bring to a boil.


Once it has come up to a boil, reduce the heat to low and add 1/3 to 1/2 can of the evaporated milk. If rotating you can use milk, 1/2 and 1/2 or heavy cream for this.
Stir until incorporated. Serve with crusty bread.


I added some fresh basil from my garden and shredded Parmesan cheese at the end. ENJOY!


Roasted Creamy Tomato Soup

2-3 Cans tomatoes

2 TBS. Garlic

2-3 TBS Minced Garlic

Italian Seasoning to taste

Salt and Pepper to taste

1 can chicken broth

1/2 can evaporated milk


Pour tomatoes and spices onto cookie sheet. Roast at 400 for 45 minutes to an hour. Pour into blender or food processor. Pour back into pot and add can of chicken broth. Bring to a boil. Add evaporated milk. Stir and serve. Enjoy with basil and Parmesan!!


Wednesday, December 16, 2009

Holiday Food Storage Gift Ideas *2009*

It's that time of year when we start to think about family and friends and showing them that we appreciate them. What better way to rotate your food storage than with Christmas gifts?

One of the gifts I'm giving this year are little pots of wheatgrass (tutorial here). Wheatgrass is grown from regular wheat kernels (i.e. cheap!). This picture is taken exactly one week after I put the wheat in water.


Look at the root system that's developed after only a week!


This is two weeks from starting. You can pick up darling holiday mugs at a dollar store--or tie a festive ribbon around a terra cotta pot. Quick and easy!


Here's another idea: make up big batches of granola and package them up in bags with festive ribbons. There are two food storage friendly granola recipes we love here and here.

Here are some holiday gift ideas from last year:

Tuesday, December 15, 2009

Tuesday

Every Tuesday, we post specific items you should gather in order to supplement your 72-hour kit, your 3-month supply, and your longer-term storage. If you are new to our blog, don't worry! You won't be left behind. Just start up where we are and follow along. You will eventually have everything completed! Once the 72-hour kit is complete, we'll be putting together emergency car kits again (week by week). Once those are done, we'll gather the 72-hour kits again. So don't worry, just jump on in and join us where we are today!


This week for your 72-hour kits, add some trash bags.  They come in very handy for, well, trash - but they are also handy for keeping things dry if there's rain.


How is your three-month supply coming along?  It's hard to stay focused during the busy holidays, especially when you may feel strapped for cash.  Just pick up an extra can or two of food when you hit the grocery store - every little bit helps.


We're still gathering oats for our longer-term storage this month.  Gotta love oats!  Oatmeal bread, oatmeal cookies, oatmeal for breakfast, granola bars, granola cereal.... yum!

Monday, December 14, 2009

Motivational Monday

"Work is an antidote for anxiety, an ointment for sorrow, and a doorway to possibility."

President Dieter F. Uchtdorf "Two Principles for any Economy"

Saturday, December 12, 2009

Cookbook Winner

Thanks to everyone who participated in our PW Cookbook giveaway!  We used random.org to find a winner, and we got comment #36!

#36 Stacey Gray, who said: "Oh I would LOVE to have her cookbook!  My favorite recipe of her's is for Potato Bundles-they are SOOOO good!"

Congratulations, Stacey Gray!  Please email us ASAP at safelygatheredin (at) gmail. com so we can ship your prize to you.

Again, thanks to everyone to participated.  This giveaway was done to celebrate our new blog design, which was done by Gypsy over at Sashwhy's Studio.  Thanks Gypsy for doing an awesome job, and thanks for putting up with us!  :)

Friday, December 11, 2009

Food Storage Friday: Roasted Chickpeas

First up, I'd like to take this opportunity to apologize for the lack of focus in this post. Honestly, I've never had such a time with picture taking. Miserable.


I'm only beginning to understand how versatile chickpeas are. This recipe for roasted chickpeas came from here. I bet even kids would like beans covered in sugar and syrup.


Ingredients: chickpeas, apple cider vinegar, canola oil, maple syrup (in tupperware), salt, nutmeg, cinnamon, and ginger.


Rinse your chickpeas


and pat them dry with a clean towel.


Now add the chickpeas and all the other ingredients to a bowl. I'm going to go out on a limb and say that real maple syrup would probably be better if you can afford the liquid gold. Me, I just use the homemade stuff.


Hey look! This picture is in focus!


Mix it all together and spray a cookie sheet with cooking spray.


Toss it in the oven and cook, stirring every 10 minutes or so. I cooked them a bit longer than the recipe suggested and at a higher temp, following suggestions here. Probably 45 plus minutes at 400 degrees. I wanted to get them nice and crunchy.


And a little charred. That part was unintentional.


These were delicious! Kind of like a healthy corn-nut, confession: I always buy corn-nuts on road trips.

They would have been great as a salad topper if they had lasted long enough, we ate this batch in one setting. You could also easily change the seasonings around maybe garlic salt or so and make them a salty snack instead. Perfect for appetizers at a holiday party, or just a healthy snack at home!


Pumpkin Spice Roasted Chickpeas

recipe from peasandthankyou.com

1 can of chickpeas, rinsed, drained and patted dry

2 T. maple syrup

1 t. canola oil (or oil of your choice)

1 t. apple cider vinegar

1/8 t. salt

1/4 t. nutmeg

1/4 t. ginger

3/4 t. cinnamon

Preheat oven to 350. Combine all ingredients in a large mixing bowl until evenly coated. Spread chickpeas on a cookie sheet sprayed with cooking spray. Bake for 25 minutes. Stir chickpeas every ten minutes to ensure even crisping.

Thursday, December 10, 2009

Pioneer Woman Cookbook GIVEAWAY!!! ****UPDATE CONTEST CLOSED****

I just want to start by saying that I know that Pioneer Woman doesn't have much to do with "food storage"... but we wanted to give away something very special to celebrate our new design! Not a fan of Pioneer Woman? That's fine - I can almost guarantee that you know someone who is, and this would make a great Christmas gift!


The Pioneer Woman is one of my absolute favorite blogs. I credit PW as (one of ) my blogging inspirations, and I was thrilled when she came out with her own cookbook.

In the cookbook are step-by-step photos of delicious recipes

as well as peeks into her daily life with amazing photographs.

My girls and I braved the crowds to meet PW and get my cookbook autographed.

It was awesome! Really, her beans and cornbread recipe changed my outlook on beans entirely. I didn't tell her so, I was far too star struck.

PW, me and my 5 year old


We'd like to giveaway a copy of PW's cookbook to one of our readers!

autographed by the Pioneer Woman herself!

*****************************************
There are two ways to enter this giveaway-

1. Leave a comment below telling us your favorite PW recipe (if you are a PW fan). If you aren't a follower of PW's blog, that's fine - tell us what you are giving someone for Christmas this year (you don't have to say who you are giving it to.. but basically we need some gift ideas) :)

2. For a second entry into the contest, add (or replace) our new button on your blog! Leave a second comment with a link back to your blog.

The giveaway will go until Friday at midnight EST. We'll announce the winner on Saturday.

GOOD LUCK!

*We purchased this book for our giveaway with funds from e-book sales and advertising. Thank you!

A new look for a new year!

We're celebrating the New Year a bit early here at Safely Gathered In!  We've got a brand new blog look!  We're hoping to make this blog easy to navigate so that you can find the things you need more quickly.

Not all of the links are working yet, but hopefully everything will be up and running smoothly by the beginning of next week.  Meanwhile, stay tuned because we'll be having a very special giveaway coming up soon!

Tuesday, December 8, 2009

Tuesday... and some blog business!

Every Tuesday, we post specific items you should gather in order to supplement your 72-hour kit, your 3-month supply, and your longer-term storage. If you are new to our blog, don't worry! You won't be left behind. Just start up where we are and follow along. You will eventually have everything completed! Once the 72-hour kit is complete, we'll be putting together emergency car kits again (week by week). Once those are done, we'll gather the 72-hour kits again. So don't worry, just jump on in and join us where we are today!


This week for your 72-hour kits, add some disinfectant.  I like those Lysol wipes, personally.  You definitely want something to be able to clean your surroundings with - you just don't know what kind of situation you will find yourself in during an emergency!


How is your three-month supply coming along?  Don't forget to store water.  You should have two weeks worth of water stored up.  Click here to read a great article on how to clean out juice bottles that you can store water in.  You can also learn about different water storage methods here.


We are still gathering oats for our longer-term storage this month.  LDS Catalog sells oats already canned up in #10 cans here (approx $20 for 6 cans).  Price includes shipping.  This would make a great Christmas gift!  Another great gift would be a "Home Storage Starter Kit".  It includes 2 cans of hard red wheat, 2 cans of white rice, 1 can of pinto beans, and 1 can of oats.  You also get several pamphlets with it.


Finally... we are giving our blog a major makeover, so things might be a little crazy over the next few days.  Please bear with us as we make these big changes!

Monday, December 7, 2009

Inspirational Thought

"There is something holy about work; even in times of plenty, it is a necessity. While work is not all of life, it nevertheless can keep us mindful of our blessings."

~Elder Neal A. Maxwell 1926-2004
Look Back, p.10.

Saturday, December 5, 2009

Saturday Roundup: Welcome to December!

Some THRIVE meat has been recalled via All About Food Storage, details here. And totally unrelated to meat, there is a delicious looking recipe for dried apples here, now that's a reason to get dried apples.

Everyday Food Storage
has a pdf download available on how to survive the flu as a mom. My strategy is the dvd player, saltine crackers and sprite. The ideas here are much more in depth.

Wanna learn more about split peas? Food Storage Made Easy has an informative post here.

If your home runs on gas, iPrepared explains how to shut your gas off in case of an earthquake. Also from iPrepared, details on why it's not a good idea to wax cheese to preserve it.

A great Christmas gift idea from Preparedness Brings Peace: have a neighborhood food drive instead of exchanging gifts. That would be a time and stress saver, not to mention the added benefits of service. There is even a sample invitation here.

Preparedness Matters has instructions on how to make homemade cheese from powdered milk. Looks instense, but if you are a cheese lover you may be interested.


Have a wonderful weekend!

Friday, December 4, 2009

Food Storage Friday: Easy Rosemary Bread


Another guest post from my sister, Sarah.


This is possibly the easiest, cheapest bread recipe I have ever come across. It came be dressed up in many different ways. It can be turned into bread sticks or jalapeno cheddar style. But my favorite is made with rosemary.


Combine four cups warm water, 1 1/2 tbsp of yeast, 1 1/2 tbsp salt and 1 1/2 tbsp sugar in a bowl. Let stand ten minutes.


Add flour. I usually start off with five cups and then add as much as it takes for the dough to start pulling away from the sides of the mixer.


Add two tablespoons rosemary, or whatever else you want in your bread.


Let rise for one hour, or until it doubles in size.


You can either bake them in bread pans, form 2-3 loaves on a cookie sheet, or pull them into bread sticks.


Top them with olive oil and some rosemary. When I'm not doing only food storage I like to brush the loaves with egg whites. This gives it the shiny, hard crust.


Bake at 450 degrees for twenty minutes and you're done.


Rosemary Peasant Bread

4 cups water
1 1/2 Tbsp yeast
1 1/2 Tbsp Salt
1 1/2 Tbsp sugar
7-10 cups flour
2 Tbsp rosemary

Combine four cups warm water with yeast, salt and sugar. Let stand ten minutes. Add flour until dough starts to pull away from the sides of the bowl. Add rosemary. Allow to rise for one hour or until dough doubles in size. Top loaves with olive oil or egg white and rosemary. Bake in or on greased pans for twenty minutes at 450 degrees F.

Thursday, December 3, 2009

Basic Cooking Skills: Pizza

Every other Thursday we will post about different basic cooking skills. Knowing how to prepare meals from scratch is a very important step in becoming self-reliant, which in turn is a crucial component of being prepared. Being able to cook meals for your family will give you confidence, more family togetherness time, and lower your food budget=more money for food storage! If you have a basic cooking skill you'd like to learn, email us! These meals contain perishable food items as this is a different series than our food storage recipes.


When you are cutting your budget and trying to save money, the first thing you miss is going out to eat: getting take out, ordering a pizza and so on.

You can make delicious restaurant foods at home for a fraction of the cost. It's true, I promise. You can sit at home and eat burgers, fries and pizza and still save your money. And gosh darn it if it isn't delicious to boot.


There are hundreds of pizza dough recipes out there, and most of them are delicious. The one I'm going to share today is from MoneySavingMom (here). The reason why I picked this one is because it's a delicious yeasty dough that doesn't require rising. So, you could decide at 4:30 that you wanted pizza for dinner and have it on the table no later than 5:15. That's my kind of cooking.

Ingredients for the dough: flour, yeast, salt, sugar, oil, and water


To warm water, add the yeast


sugar and salt


and mix it up. I like to let it sit here for five minutes, just so the yeast can eat up the sugar. It's not necessary though.


Take the five minutes to spray your pans with cooking spray or wipe down with oil.


And sprinkle with cornmeal, just so it doesn't stick.


See how bubbly it is after five minutes? This is how you know your yeast is working.


Add the oil


and the flour


And stir with your hands or a wooden spoon for about five minutes, just until it comes together into a combined ball. You can definitely make this in a mixer and just turn on the mixer for 3-4 minutes and call it good.


Preheat your oven. Crank it ALL the way up. Smitten Kitchen recommends cooking pizza at your oven's top temperature, her basic pizza dough recipe is quite delicious too (found here).


I doubled the recipe today so I could make two nice thick-crusted pizzas. When I don't double the recipe, I still make two pizzas, they are just thin-crusted, which is what Mountain Man prefers.


You can use a rolling pin to roll the dough out, OR just flatten the dough directly onto your pan, using your hands and fingertips to press it out to the diameter you want.


Pizza can be as simple or complex as you want. For my kids all I do is a cheese pizza: can of tomato sauce, mozzarella cheese (although they like cheddar as well).


Grate your cheese, you will only need 2/3 of a 1 lb block of cheese for both pizzas.


Spoon some tomato sauce onto the unbaked crusts. I like to buy tomato sauce because I can use it for both pizza and spaghetti sauce. You won't use all the tomato sauce for the pizzas, so transfer the leftover sauce to a tupperware to store in the fridge. Never store open tin cans in the fridge.


You can spice up the sauce by adding some spices or red pepper flakes etc. Or you can leave it plain. If I remember I spice it up, if I forget, it goes un-spiced.


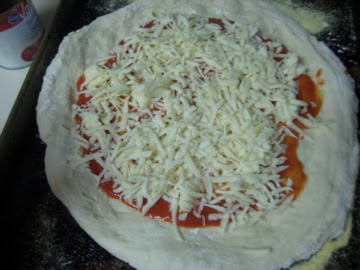
Spread out that cheese.


You don't need a lot of cheese. The cheese is definitely the most expensive ingredient in pizza making, so don't over do it. Cheese melts (amazingly huh?) and when it melts it spreads covering more surface area than it does when it's a solid.


Bake in your super hot oven for 10 minutes or until the cheese is blistered and delicious. If I bake two pizzas at the same time, I switch the racks halfway through baking time so one doesn't get more brown than the other.


Let the pizza sit for a few minutes after you pull it from the oven. It will be easier to cut and the cheese will stay on better.


Don't settle for cheese and pepperoni, make yourself a veggie pizza, margherita, meat lovers, whatever you want! And if you like thin-crust pizza, just make the original recipe below and split it into two pizzas. The nice thing about making your own is that you can make it however you want and not worry about your wallet.

Pizza Crust
adapted from moneysavingmom.com

1 Tbsp. active dry yeast
1 cup warm water (105 to 115 degrees F.)
1 tsp. sugar
1 tsp. salt
2 Tbsp. vegetable oil
2 1/2 cups flour


Mix warm water, yeast, sugar and salt in a bowl and let sit for five minutes. When bubbly, mix in oil and flour. Knead or mix until you have a smooth dough. Roll out into two thin-crust pizzas onto your baking sheets. Top with sauce and toppings and bake at your oven's highest temperature for 10 minutes or until the cheese is melted and blistering.