-->

Friday, October 29, 2010

Food Storage Friday: Pumpkin Oatmeal

Since we're gathering oats this month, and it's autumn, I thought this would be the perfect recipe to share today.

Pumpkin oatmeal! I got this recipe from "Deceptively Delicious" cookbook. The cookbook has some interesting recipes (read: scary) and some real winners, and this is a winner.

I will say sorry for the dark pictures. There's not a lot of natural light at 7 am in the morning this time of year.


Ingredients: oats, canned pumpkin, powdered milk, peanut butter, vanilla, brown sugar, cinnamon


Start by mixing your water and powdered milk in a saucepan. Of course you can use regular milk. And probably even just plain water, although milk makes oatmeal super creamy.


Add the brown sugar

Canned pumpkin, I'm always generous with the pumpkin because I love it so
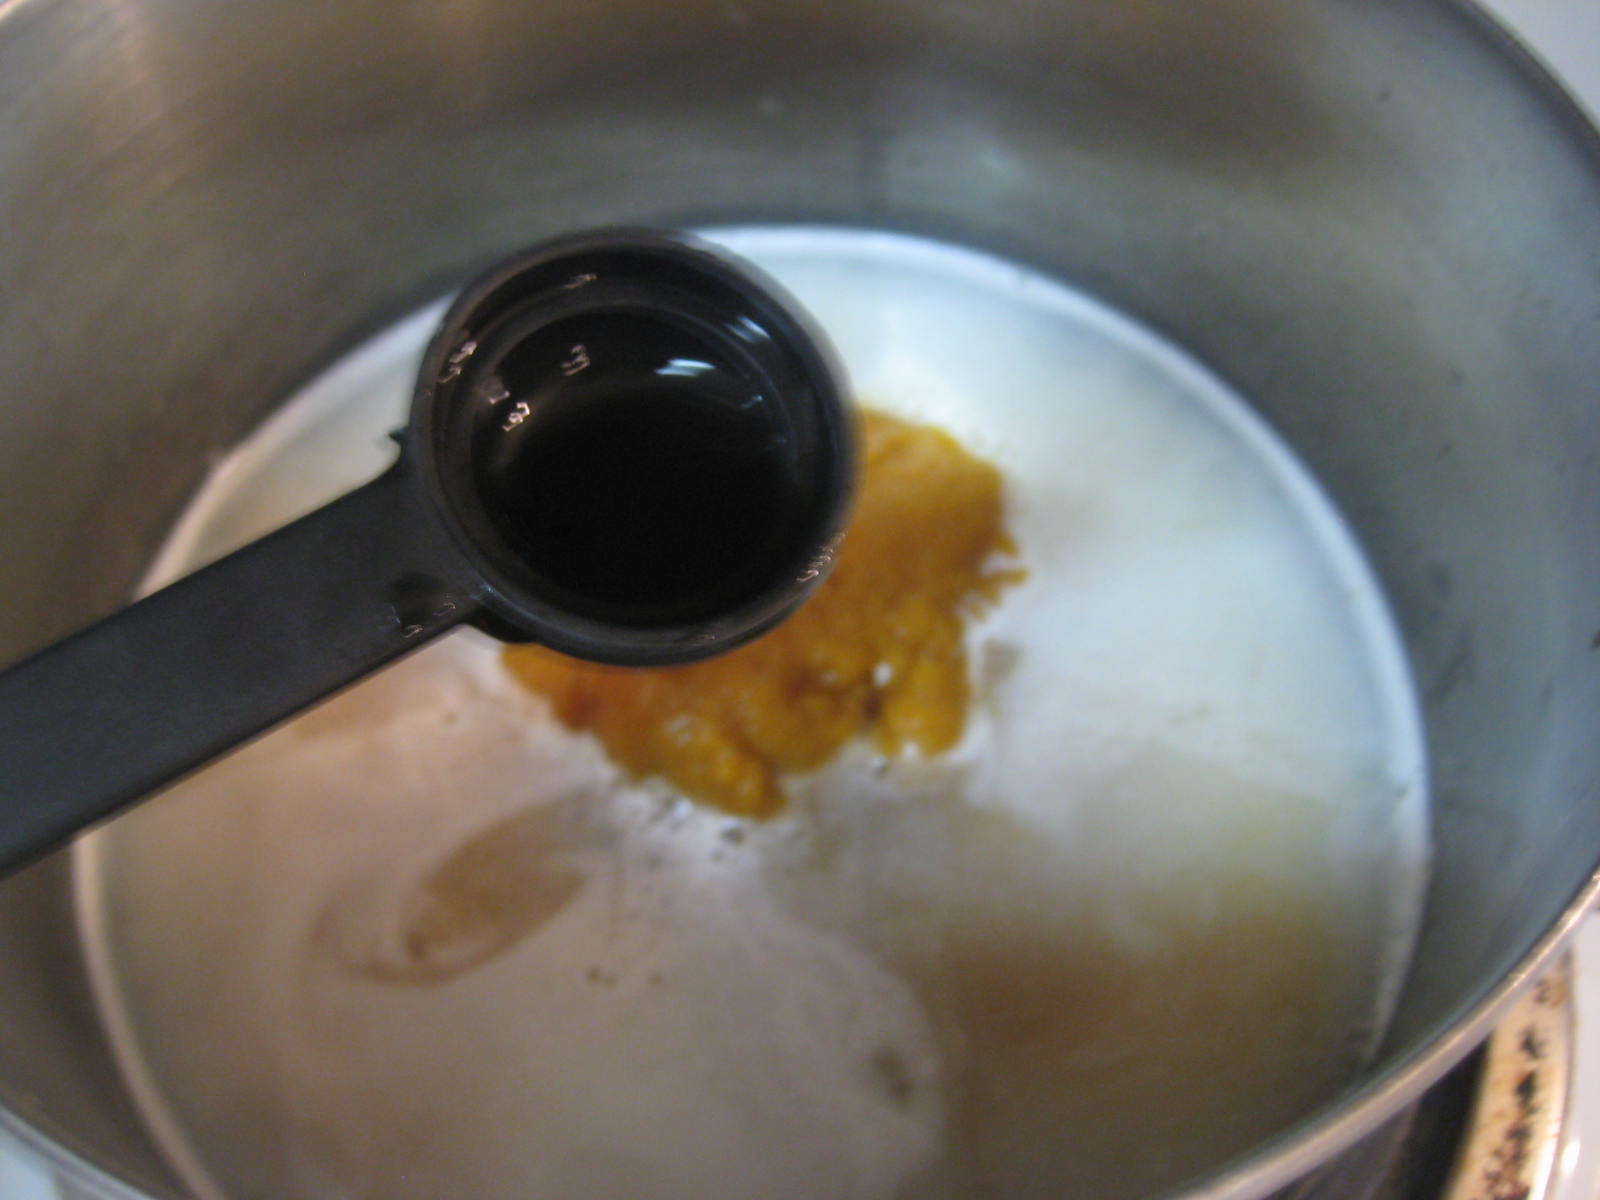

vanilla

and cinnamon.

Stir it up and let it come to a gentle boil.


Add oats, reduce heat and cook for 2-3 minutes.


Finally, stir in a generous spoonful of peanut butter. Delicious!


I will admit that I'm guilty of throwing everything in together at the beginning (even the peanut butter) and cooking it on medium low for 5-10 minutes instead of waiting for it to boil. It comes out great either way.


Delicious hearty breakfast, and my kids love it.


Pumpkin Oatmeal
adapted from "Deceptively Delicious"
serves 4

2 cups milk (enough powdered milk to make this up)
1/2 cup brown sugar
1/2 cup canned pumpkin
2 tsp vanilla
1/2 tsp cinnamon
2 cups oats
4 tsp peanut butter (I just throw in a nice big spoonful)


In a saucepan, combine the milk, sugar, pumpkin, vanilla, and spice. Bring to a gentle boil. Add oats. Reduce heat and simmer for 2-3 minutes until the oatmeal is soft and creamy. Stir in the peanut butter, serve.

Wednesday, October 27, 2010

Food Storage Tuesday

Every Tuesday, we post specific items you should gather in order to supplement your 72-hour kit, your 3-month supply, and your longer-term storage. If you are new to our blog, don't worry! You won't be left behind. Just start up where we are and follow along. You will eventually have everything completed! Once the 72-hour kit is complete, we'll be putting together emergency car kits again (week by week). Once those are done, we'll gather the 72-hour kits again. So don't worry, just jump on in and join us where we are today!


This week for your 72-hour kits, add a camp stove or similar... something to cook your food with.   You could get the traditional camp stove, or something smaller like the pocket rocket stove.  This little portable gas stove looks nice too, and so does this other 1-burner stove.  Lots of options... read up on the different kinds to determine what would work best for your family, and for the kinds of food you have in your kits.  These would make great Christmas gifts, too!


How's your three-month supply going?  Is anyone storing more than three months of food (besides your longer-term storage, of course)?  If you are new to our site and don't know where to start, check out our blog post about how to make a food storage plan.


We are still gathering oats this month for our longer-term storage.  Thanks for all the comments on last week's post about eating oatmeal for breakfast!  I got a lot of great ideas!

Monday, October 25, 2010

Inspirational Thought


“Common sense (which, in truth, is very uncommon) is the best sense I
know of: abide by it; it will counsel you best.”

Lord Chesterfield
1584-1656

Friday, October 22, 2010

Food Storage Friday: Pumpkin Granola

I came across this granola recipe and had to try it out. Quite delicious and perfect for fall!


Ingredients: oats, puffed rice cereal, salt, brown sugar, applesauce, pumpkin puree, maple syrup, vanilla, chopped nuts, dried fruit of choice, cinnamon, ginger, allspice and nutmeg


Pour pumpkin, applesauce, brown sugar, maple syrup, vanilla, spices and salt into bowl and mix well
Combine oats and rice cereal in large bowl, pour wet ingredients onto dry and mix well. Spread onto a cookie sheet in an even layer. Bake at 325 for 25-30 minutes then turn the granola with a large wide spatula. Add nuts and bake for an additional 15 minutes. Add dried fruit when granola is cooled.


Pumpkin Granola
original recipe from bakingbites.com

3 1/2 cups rolled oats
2 1/2 cups puffed rice cereal
1 Tbs Cinnamon
1 tsp ground Ginger
1/2 tsp Nutmeg
1/2 tsp allspice
3/4 cup brown sugar
1/2 cup pumpkin puree
1/4 cup applesauce
1/4 cup Maple syrup
1 tsp Vanilla
1 1/2 cup chopped nuts
1 cup dried fruit- I used Craisins

Bake at 325 for 25-30 minutes, flip, add nuts and bake for additional 15 minutes. Let cool on cookie sheet. Enjoy!


Tuesday, October 19, 2010

Food Storage Tuesday

Every Tuesday, we post specific items you should gather in order to supplement your 72-hour kit, your 3-month supply, and your longer-term storage. If you are new to our blog, don't worry! You won't be left behind. Just start up where we are and follow along. You will eventually have everything completed! Once the 72-hour kit is complete, we'll be putting together emergency car kits again (week by week). Once those are done, we'll gather the 72-hour kits again. So don't worry, just jump on in and join us where we are today!


This week for your 72-hour kits, add any pet supplies that you may need (when applicable), and also add some work gloves.  1 or 2 pair per family is fine.


How's your three-month supply going?  Abbie post a great article she wrote last week about food storage sweeteners.  Be sure to check it out!  What is your favorite sweetener?


This month for our longer-term storage we are gathering OATS!  Growing up I was never a huge fan of oatmeal but now I force myself to eat it for breakfast at least 3 times a week... it's so healthy and cheap!  What is your favorite oatmeal recipe?

Monday, October 18, 2010

Motivational Monday


"It is easy in the world to live after the world's opinion; it is easy in solitude after own own; but the great man is he who in the midst of the crowd keeps with perfect sweetness the independence of solitude."

Ralph Waldo Emerson (1803-1882)
-- Series I. Self-Reliance

Friday, October 15, 2010

Food Storage Friday: White Bean and Tuna Salad


I'm always looking for more ways to use up tuna. Tuna is a great thing to store because it's a fairly inexpensive protein, but by golly, you can only eat so many tuna sandwiches.

Ingredients: Tuna, white beans (navy, great northern, cannellini) onion powder (or salt), cider vinegar, dried or fresh parsley, Tabasco sauce, black pepper, olive oil


Being in the South, my climate is still pretty warm, so my herbs are doing fine. You can also grow herbs inside on your window sill in the winter. Fresh herbs are wonderful to have around, but you can always sub dried in.

Drain the tuna and put in a bowl

Add your white beans. I was out of canned, so I cooked some up from dried. A can of beans has about 1 and 2/3 cup of beans in it.

Onion powder (I used onion salt)

black pepper

apple cider vinegar

some heat!

and parsley. The parsley gave it a distinct taste. If you used mint, it would probably go in another direction.

a little drizzle of olive oil to combine it all together. Mix carefully, you don't want a mishmash surprise.
Serve! I ended up eating these wrapped in lettuce, but you could serve the salad on a sammie, plain, with crackers...the sky's the limit!


White Bean and Tuna Salad
original recipe here

1 tsp onion salt
2 Tbsp apple cider vinegar
2 (5 oz) cans of tuna fish
2 (15 oz) cans of cannellini or Great Northern white beans, rinsed and drained
1/2 cup chopped parsley (or mint) or 1/2 tsp of dried
a few splashes of Tabasco sauce
1/2 tsp black pepper
salt and olive oil to taste

Drain tuna and place in bowl. Add beans and stir gently. Add the onion powder, herbs, black pepper, cider vinegar and mix. Add Tabasco sauce. Drizzle a little olive oil and stir gently to combine all flavors.

Wednesday, October 13, 2010

Food Storage Sweeteners

Today we'll explore different types of sweeteners that you can store in your food storage. All the beans and wheat in the world will get pretty bland without a little sugar to lighten them up.

White-Sugar-Crystals_91637-480x360
photo credit

Sugar Common table sugar is generally made from sugar cane or sugar beet.

Storage life:
White sugar will store indefinitely (aka forever) as long as it is stored in a cool, dry area. You want to cover your sugar, both for pests and because sugar is highly susceptible to moisture. When canning sugar using a canner, omit the oxygen packet, it will suck out all the moisture and make your sugar into a hard rock.


photo credit

Brown Sugar Brown sugar is basically just white sugar with added molasses, making it moist and giving it color. I don't know what I'd do without brown sugar on my oatmeal. Natural brown sugar or raw sugar is made from the first crystallization of sugar cane. Natural brown sugar is also known as turbinado sugar and other types of natural sugars.

Storage Life:
Since brown sugar is just a variation of white sugar, it's shelf life is similar. Brown sugar does harden over time though. Some ideas to keep it soft are to put a slice of bread or some apple slices into your brown sugar over night. The sugar will suck out the moisture and soften. You can also use a piece of clay (my mom has a cute bear shape piece) and soak it in water, dry the outside, and store it with your brown sugar. Make sure the sugar is in an airtight container, always covered.


photo credit

Honey Honey is a sweetener made by bees from the nectar of flowers. If you've never had honey drizzled onto fresh baked bread, you're really missing out! Because honey has a natural presence of endospores, you shouldn't give it to children under the age of 1 year old. Which is something to plan for when considering food storage.

Storage Life: Because of it's high content of sugar, honey has a very long shelf life. Keep it covered tightly and stored in a cool, dry place. Over time, honey will crystallize which will affect the texture, but not the taste or quality.

agave nectar
photo credit

Agave Nectar Agave nectar or syrup is made from the agave plant in Mexico. The same plant that gives us tequila interestingly. Agave is the sweetener of choice for vegans because it is natural and in it's raw form and is not made by bees. Here is a link for substituting agave nectar for other sugars. We've substituted agave for sugar in two recipes here on the blog: Fruit Leather and Raisin Bran Muffins.

Storage Life: 2-3 years is all the storage life is. That combined with the expensive price tag, doesn't make this my number one choice, but it is a nice alternative to have around.


Corn Syrup Corn syrup is made from corn (maize) and is not the same thing as high fructose corn syrup which is a swear word in today's society. If you've ever had a popcorn ball, you've had corn syrup.

Storage Life: Pretty much indefinite, open or unopen. Which is good because I don't think I've gone through the bottle I bought when I moved here 6 years ago. Whatever your feelings on corn syrup are, it is inexpensive and if money is tight, it might be a good thing to add to your food storage in a small quantity.

photo credit

Maple Syrup No I'm not talking about Mrs. Butterworth's syrup. Real maple syrup is a syrup made from the sap of maple trees. Just a random fact: in the Civil War, the northern states were encouraged to make their sugar last by sweetening their foods with maple syrup or maple sugar because sugar cane was produced in the southern states by the slaves. If you want to learn about making maple sugar, read "Little House in the Big Woods" by Laura Ingalls Wilder (my daughter and I are reading the books). Syrup is, of course, wonderful on pancakes, but it's also great as a topping for oatmeal and can be used to replace sugar in some recipes.

Storage Life: The shelf life of unopened maple syrup is 1 year. After opening the syrup, you have six months as long as it is stored in the refrigerator.

Did I miss your favorite sweetener? Could you live without a bit of sweet in your food storage? One sweetener I always have in my food storage...Nutella!

Tuesday, October 12, 2010

Food Storage Tuesday

Every Tuesday, we post specific items you should gather in order to supplement your 72-hour kit, your 3-month supply, and your longer-term storage. If you are new to our blog, don't worry! You won't be left behind. Just start up where we are and follow along. You will eventually have everything completed! Once the 72-hour kit is complete, we'll be putting together emergency car kits again (week by week). Once those are done, we'll gather the 72-hour kits again. So don't worry, just jump on in and join us where we are today!


This week for your 72-hour kits, add mess kits or disposable plates/cups/silverware.  You can find these at your local Walmart, or even on Amazon.  


How is your 3-month supply coming along?  I know I just said this a few weeks ago, but make sure you are "stocked up" for winter: canned soups, Gatorade (bottles or dry mix), cold medicines, tissues, hot chocolate mix, etc.  Anything else I'm missing?  What do you like to have on hand during the winter?


We are still gathering oats this month for our longer-term storage.  Not sure what to do with oats?  Check out our food storage oats recipes.


Monday, October 11, 2010

Inspirational Thought


The responsibility for our social, emotional, spiritual, physical, and economic well-being rests first on ourselves, second on our family, and third on the Church. Under the inspiration of the Lord and through our own labors, we should supply ourselves and our family with the spiritual and temporal necessities of life.

We are better able to take care of ourselves and our family when we are self-reliant. We are prepared to endure times of adversity without becoming dependent on others.

We can become self-reliant by (1) taking advantage of educational opportunities; (2) practicing sound principles of nutrition and hygiene; (3) preparing for and obtaining suitable employment; (4) storing a supply of food and clothing to the extent the law allows; (5) managing our resources wisely, including paying tithes and offerings and avoiding debt; and (6) developing spiritual, emotional, and social strength.

In order to become self-reliant, we must be willing to work. The Lord has commanded us to work (see Genesis 3:19;D&C 42:42). Honorable work is a basic source of happiness, self-worth, and prosperity.

"Welfare" LDS Gospel Library, emphasis added

Friday, October 8, 2010

Food Storage Friday: Chicken Casserole

So, one of our readers (hi Pam!) sent in this great recipe just yesterday, and I just so happened to have all the ingredients in my house and I had to try it out.  It was a big hit and I'll definitely be adding this to our food storage meal rotation (and our three-month supply plan).

The sad part is.... my point-and-shoot camera has recently broken (it was dropped one too many times).  So, I wasn't able to document the recipe with any images, but trust me when I say, it was great.

Chicken Casserole (serves 8)

2 cans of chicken
1 can mixed veggies
1 can cream of chicken soup
1 can cream of mushroom soup
1 can evaporated milk
1-2 boxes prepared stuffing

Combine the first 5 ingredients in a casserole dish.  Evenly spread prepared stuffing on top.  Bake at 350 for 45 minutes.

Yum!  I ended up making this in two casserole dishes and freezing one of them for a dinner on a busy day.  It was so good and I recommend it!

Thanks again, Pam!

If any of our other readers have food storage meals they'd like to share, please email us at safelygatheredin (at) gmail.com.

Thursday, October 7, 2010

Cold Weather Preparedness

I love Fall and I hope it lasts a while, but the reality is that cold weather is approaching for many people, so let's go over some things we can do to prepare for cold weather.  I originally posted this article last Fall, but I think it's worth repeating!  I've also added a few things.


Make sure your car kits are up to date. If you didn't put together a kit last time we did them week by week, click here to check out the list of what we recommend. Consider adding some extra blankets and towels, especially if you live in colder climates, and definitely if you regularly drive on rural roads. Update your food and water, if necessary. Many people have asked us about water going bad in plastic bottles over time. If you rotate, this won't be as much of an issue, especially in the winter. You should have a kit in every car your family drives.

Keep your cell phones charged. I plug in my cell phone every night, regardless of whether or not I need to. You never know when the power is going to go out and you won't have a chance to charge it. I do have a cell phone charger outlet in my crank powered flashlight/radio in my 72-hour kits, in case I need it (although, that wouldn't help me in the car.. maybe I should move it to my car?). An upgrade: buy some walkie-talkies to share with your neighbors so that you can keep in contact during an emergency, in case the phone lines are down.

Have proper heating backups. Technically, you can safely keep your house at a cool 40
degrees without worrying about health hazards or your pipes freezing. Layer up - blankets, warm clothing, etc. Consider getting some space heaters or other alternative heat sources in case your power goes out. Of course, make sure you know how to operate them properly before you actually need to use them in an emergency. An upgrade: get a generator. Neither Abbie nor I have these, but with some online research I'm sure you could find one that's perfect for your home, if desired.

Know where your flashlights are. Sometimes the most annoying part of losing power is actually trying to find those flashlights, especially if it's completely dark! I hate digging through our 72-hour kits to find our lighting sources. It would be helpful to buy a cheap flashlight to keep somewhere in each room. The key for me will be keeping it in a place where I can easily find it in the dark, but hiding it well enough so that my two-year-old doesn't see it and demand to play with it, thus wearing out the batteries. An upgrade: keeping a wind-up flashlight in each room.  This one on Amazon is on sale, and has great reviews. You can also find them in stores.

Bundle up. When I was growing up, my parents kept a big wooden box full of hats, mittens, and scarves in our mudroom. Every time we left the house during the winter, we were required to put them on (or at least bring them with us). At the time I was pretty embarrassed (high schoolers don't usually wear knit hats with reindeer on them), but I now appreciate the precautions. We drove on a lot of rural roads in New England, and I wasn't driving the most reliable car (a 17 y/o VW Quantum...), so if we had ever broken down on the side of the road, those warm layers would have really come in handy. Actually, they came in handy anyway because I was usually to my destination before the heat started to work! There's no real upgrade for bundling up.

Gas up.  My parents also insisted that we never let our gas run lower than half a tank.  You never know when you will be stranded on the side of the road in a snowstorm, and you may need to keep your car on for warmth (just be sure your exhaust pipe is not blocked!).  Keeping the gas relatively full in your car is a great preparedness method anyway, but especially so in the winter.

For more ideas and tips for storm/power loss preparation, check out a guest post from a few years ago, "What I Wish I'd Known During the 2008 Ice Storm".

What do you do to prepare for cold weather?

Tuesday, October 5, 2010

Food Storage Tuesday

Every Tuesday, we post specific items you should gather in order to supplement your 72-hour kit, your 3-month supply, and your longer-term storage. If you are new to our blog, don't worry! You won't be left behind. Just start up where we are and follow along. You will eventually have everything completed! Once the 72-hour kit is complete, we'll be putting together emergency car kits again (week by week). Once those are done, we'll gather the 72-hour kits again. So don't worry, just jump on in and join us where we are today!


This week for your 72-hour kits, add some small entertainment items.  Coloring books, decks of game cards, and crayons are all good options.  Just make sure it's small and light!


Also, I can't believe I forgot to mention this last week, but it's time to "rotate" your car kits and 72-hour kits.  We do this every 6 months.  Check the expiration dates for the food and other items that may expire.  Switch out the bottles of water if needed.  If anything expires in the next 6 months, take it out and replace it, and then use the item you've taken out before it expires.


How's your three month supply coming along?  Make a plan!!!  Plan out recipes you like to make, then make a plan to eat each meal a certain number of times during those three months (once a week? That's 12 times. Every other week? 6 times).  Then create your master shopping list from that.  The hardest part for me is keeping track of what I have and what I use, but I'm getting better.  If you don't have the time or don't want to create your own plan and shopping list, check out our food storage e-book.

We are gathering oats this month for our longer-term storage. Emergency Essentials sells oats in #10 cans and in buckets, too.  Check them out here.

Monday, October 4, 2010

Motivational Monday

"We are all self-reliant in some areas and dependent in others. Therefore, each of us should strive to help others in areas where we have strengths. At the same time, pride should not prevent us from graciously accepting the helping hand of another when we have a real need. To do so denies another person the opportunity to participate in a sanctifying experience."

Marion G. Romney, “The Celestial Nature of Self-Reliance,” Ensign, Mar 2009, 61–65

Friday, October 1, 2010

Food Storage Friday: Raisin Bran Muffins

I've really been enjoying your comments on yesterdays 72 hour kit post. You all have some great suggestions that I want to adapt to my kits, thank you!

I am a big fan of muffins. Sweet or healthy, I love them all. I'm always on the lookout for healthy muffin recipes and this one is a winner.


I found this recipe on Trainer Momma's website, she has some great healthy recipes (original recipe here).

Funny story about why there aren't any pictures: I wrote down the recipe in my planner to make sometime and I left out the egg on my written copy (completely on accident). In my mind I was thinking that it wasn't a food storage recipe, so I didn't take pictures, but when I finished, I thought---hey! These would be a great food storage addition! It wasn't until I was writing this post and went back to the original recipe to source it that I realized I forgot the egg! I'll have to try them again with the egg, but since these were so delicious without the egg, I thought I'd share the recipe.

Ingredients: Raisin Bran cereal, whole wheat flour, baking soda, sugar and brown sugar (or agave nectar), salt, powdered milk, applesauce (or pearsauce is what I used), and vanilla.

Mountain Man and I have been trying to cut back on our sugar consumption, so I substituted agave nectar for the sugar. When you substitute agave for sugar, you have to decrease a liquid from another source, so I added a little less milk. If you want to use sugar, just go to the original recipe source and follow those instructions.

These are some hearty muffins! They are solid--keep you full for hours--muffins. I wonder how much of that has to do with the missing egg! My kids weren't impressed, but Mountain Man and I really liked them. They are great to have in the freezer for a quick breakfast or snack.

Raisin Bran Muffins
recipe adapted from Trainer Momma

4 cups raisin bran cereal
2.5 cups whole wheat flour
2.5 tsp baking soda
2/3 cup agave nectar
1/2 tsp salt
1 3/4 cups milk (I used powdered milk)
1/2 cup applesauce
1 tsp vanilla

Mix dry ingredients together. Mix wet ingredients together. Add wet and dry ingredients together and mix well. Bake in greased muffin tins at 350 degrees for 20 minutes. Watch them, baked goods made with agave nectar tend to brown earlier.

Enjoy!