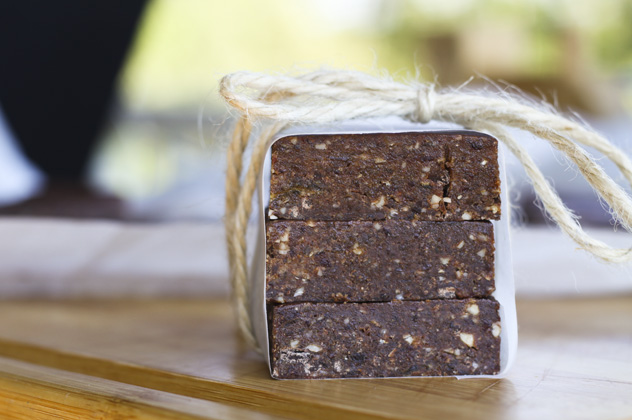
I have been looking for some "healthy" energy bar recipes lately - something that has a lot of calories that my husband can grab on his way out the door for work (lots of calories so that it can be his full meal). These certainly do the trick. Store-bought Larabars (like most good energy bars) can be pretty expensive, so this is a great alternative to paying a lot at the store.
I found the recipe here on "Foodie With Family", a really cute blog that I'm looking forward to reading more of! Her food looks delicious and the blog is laid out really nicely.
So, let's get down to business! First of all.... I don't have a food processor, which is a problem since this calls for one. However, I do have a Magic Bullet, which I use daily. So, I decided to give it a whirl. The original recipe makes 30 servings, which I knew my Magic Bullet could not handle. I cut the recipe down to 1/4 of the original, and it was the perfect amount to bring and share with the other moms and playgroup this morning.
So, the recipe (1/4 of the original... go ahead and make the full batch, or a half batch, if you have a food processor that can handle it!)... I will give you a quick rundown, but feel free the visit the original recipe for more details and some nice pictures:
1 cup whole, pitted dates
1/2 cup whole almonds (raw or toasted, I used raw/salted)
1/4 cup chocolate chips
1/2 Tbsp natural peanut butter
First, pulse your whole almonds in the food processor until they are crumbly, almost like bread crumbs. Add the chocolate chips and mix until they are also finely chopped. Set aside in a separate bowl.
Next, add your dates and mix until smooth (it will be like a really thick, sticky paste). This was pretty hard to do in my Bullet, but eventually I got it all pretty smooth. Next, add your peanut butter and mix with the date paste.
This part is a little bit different from the original recipe: next, I just dumped the paste into my almonds/chocolate, and mixed them together by hand. I knew my Bullet probably couldn't handle much more than the paste by itself.
Dump onto parchment paper inside a pan... I used a bread loaf pan since I had only made 1/4 the recipe (I cut it into 8 slices eventually). I think they turned out a bit thinner than they were supposed to but that's fine with me - they were still pretty filling! Refrigerate for a few hours, then cut and serve! (or wrap them up and keep them in the fridge until you want to eat them)
These were a big hit at the playgroup - even the kids loved them! Give them a try, I don't think you will regret it!


3 comments:
I love making lara bars but never thought of them as a food storage recipe. But of course they are!
Myspiritedadventure.blogspot.com
Some healthy storage recipe here. I must say it is crucial source of information and provide really good guidance all the time.
Hi Blog moderator,
I am really sure that you are doing well with your writing. One of my competitor has Linked my website badly for this post.
While going through my Webmaster tools I found my link on your blog.
As we are dealing into Hydroponics and you are dealing in Veggies.
The link can harm my Link Portfolio.
Can you please remove the Link of Hydroponics with the comment.
looking forward to hear from you,
Thanks,
Post a Comment