-->

Thursday, March 31, 2011

Food Storage Hunt: Everyday Food Storage

Are you enjoying our Food Storage Hunt series? We are!


Today, Crystal from Everyday Food Storage is taking us on a video tour of her food storage space.


Thanks Crystal! She has great recipes and food storage ideas at Everyday Food Storage, check it out!

Wednesday, March 30, 2011

Food Storage Hunt: Food Storage Made Easy

Julie from Food Storage Made Easy is here today to share her food storage space.


Here are some tips that I have found have made my food storage more
organized, useful, and rotated. I find building and using your food
storage to be an ever changing thing, and I keep adapting as I learn
more. I have a food storage area in an unfinished part of my basement
(I know we're lucky to have basements). I also have a little cupboard
space upstairs I use for day to day cooking.

MY FOOD STORAGE AREA: I call this my food storage
area, because it's just against a wall in my basement. In my "dream"
home, I'll have a whole dedicated room, with all sorts of super cool
shelves and stuff, but for now this is like heaven compared to my
condo before. I have three areas along the wall. One is for long term
foods, the shelves are for three month supply, and I have an area for
water. Ok- ok, I have a fourth area - it's called a big fat pile of
non-food items, and appliances that are waiting for a new shelf area
I also keep some water and my 72 hour kits upstairs in case we had to
evacuate, or my whole basement got smooshed in a disaster. Oh and this
reminds me, I need to put up a blanket against that window to block
light from getting onto my long term food. I just moved everything
around and before this wasn't an issue. Light makes food go bad
faster.


TIP FOR KEEPING MY STORAGE ORGANIZED: In my food
storage room downstairs I try to keep like foods together on shelves.
That way I can quickly get stuff assessed and know where everything is
easily. I like to keep fats together, sugars together, condiments,
and all sorts of other logical (to me) groupings.


TIP FOR MAKING USING FOOD STORAGE EASIER: I put all
the ingredients I need for making bread on one shelf in one of my
cupboards. That way when it's bread making day, I just pull all the
things off that one shelf and I'm ready to go. Having to dig, and push
through other ingredients is something I have always hated about
baking, so this way I'm ready to go right away.


TIP FOR ROTATING MY FOOD STORAGE: These are ALL the
cans in my upstairs pantry. How is this Food Storage? Well you see by
keeping very, very few of my three month supply types of foods
upstairs, I am FORCED to go downstairs to get food out of my food
storage and use it. When I go grocery shopping, I come STRAIGHT home
and put my food in the basement. Then when I need food, I have to go
down there (send one of my cute little kids) to get it. I know it
sounds annoying, but if I don't do it this way, I'd end up using
everything I just barely bought first, and my food storage in the
basement would just collect dust.


TIP FOR USING MY LONG TERM FOOD STORAGE: One way I
encourage myself to use my long term food storage such as grains and
legumes is I keep smaller containers of them upstairs. I know this
contradicts my previous tip a little - but it's different- trust me. I
save containers from nuts I get at Costco and use them to store the
smaller quantities of my long term foods. This makes making pancakes,
or muffins and all that kind of stuff with whole grains a lot easier.
I also use my legumes a lot more in soups and chili's.


TIP FOR REPLACING FOODS I'VE USED: Placed
conveniently on a work table right next to the food storage is a pad
of paper for me to write down things I take out of my food storage so
I can replace them next time I'm shopping, or next time there is a
sale. My dear husband knows if he takes something off a shelf he BEST
be writing it down on that paper - or else ;)


HEY WAIT! How did this get in here. Ok fine- when I
go grocery shopping I DON'T immediately put the food in the basement.
I put it on the stairs DOWN to the basement and deal with it later.


For anyone feeling OVERWHELMED right now- here's a
look at what my food storage area looked like 3 years ago. THIS was my
before and after. Through a lot of time, dedication, and sacrifice (no
Disney trips for us) I have been able to build it up to a little less
sad than it was.


Thanks Julie! What an inspiration. With sacrifice and hard work, you can have a great food storage just like hers. Be sure to check out Food Storage Made Easy for more great tips and ideas.

Monday, March 28, 2011

Motivational Monday


“We stand at the crossroads, each minute, each hour,
each day, making choices. We choose the thoughts we
allow ourselves to think, the passions we allow ourselves
to feel, and the actions we allow ourselves to
perform. Each choice is made in the context of whatever
value system we’ve selected to govern our lives. In
selecting that value system, we are, in a very real way,
making the most important choice we will ever make."

Benjamin Franklin
1706-1790

Friday, March 25, 2011

Food Storage Friday: No Bake Granola Bars


Aleasha provides our recipe today which she found via Tasty Kitchen. We love us some Pioneer Woman!


Toast oats, nuts and coconut in a large skillet over medium heat until
fragrant. Stir often. Remove to large bowl and toss with dried fruit.

Place oil, sugar, cinnamon, honey, salt and molasses in small
saucepan. Cook over medium heat, stirring occasionally until it comes
to a rolling boil. Turn off heat, add vanilla and stir into oat
mixture until evenly coated.

Spoon mixture into a well greased 11x7 pan, pressing down. Place in
fridge for 30 minutes to firm up.

Cut into bars. Wrap individually in plastic wrap or parchment paper.
Store at room temperature.


No Bake Granola Bars
adapted from Tasty Kitchen

2 1/2 cups rolled oats
1 1/2 cups chopped nuts, I used walnuts, almonds and pecans
1/4 cup shredded coconut (I didn't have this so just didn't add it)
1/2 cup dried fruit. I used craisins. I am sure raisins or dates or
all three would be delicious
6 Tablespoons Oil
1 cup brown sugar
1 1/2 tsp cinnamon
1 tsp salt
6 Tablespoons honey
2 Tablespoons molasses
2 tsp vanilla


Love homemade granola bars? Here's some other recipes on Safely Gathered In:

Granola Bars
Granola Bar flop

Thursday, March 24, 2011

Food Storage Hunt: Family Prepper

Rick from Family Prepper is here today to share his food storage space and ideas.


Food Storage doesn't have to be fancy or pretty. It just has to work. It is easy to start. Just find a corner or space that is cool and dark. I chose the space beneath my basement stairs. It's pretty much empty unused space anyway.

My Food Storage started with just a few 5 gallon jugs of water:


I built some shelves to add to the space. After that I started adding cans of extra's; you know extra tomato sauce or cream of chicken. Anything we normally used I just added a few extra can's and sent it to the "Pantry"...


This is pretty much how it started. Oh and on the bottom shelf is stuff we canned from the garden. As you can also see a few arms to protect ourselves per the second amendment of the US Constitution!

Gradually we added to the "Pantry" to include some good 'ole rice and beans:


As you can see it is still under construction. I intend to add a root cellar off the area when I have some time and money. To extend our storage from our garden. This was last year's mid-season growth:


I've learned a lot about gardening this year and anticipate a much better year.

Of course we continued to add water, since you can't live without it...


We also started adding pastas and oats:


A few bucks here and there and we have started to build a food storage. At this point in time we have approximately 3 months worth of food on the shelf and are beginning to look at long term food storage options. However, every person that starts storing food for emergencies is one more family that isn't out on the streets searching for food when catastrophe strikes!

Photobucket


Thanks Rick! Building a food storage supply definitely starts little by little. Don't ever think that you can't do it. Just keep adding little by little and you'll get there. Be sure to check out Family Prepper for more great ideas.

Wednesday, March 23, 2011

Food Storage Hunt: iPrepared


Catching up on our Food Storage Hunt series?

Abs' food storage
I Dare You to Eat It's food storage
Aleasha's food storage

Today we're lucky to have Wendy from iPrepared to share her food storage space with us.


I realize that having a food-storage room is an ideal situation because many homes and apartments just don't have the space. Several years ago we moved into a home with an unfinished basement. Because we wanted an entire room for storage, we stole space from the planned future family room in order to make one. Someday, we will frame off a wall just in front of the buckets. The entire space is about 10' x 13'.


We opted to use adjustable shelving systems ($89 each at Costco) instead of building our own shelves. That way if we ever move, we'll be able to easily set up a new storage area wherever we have the space. I particularly like the shelf fronts that came with the shelving units. We live in an earthquake prone area, so I've put those fronts on the shelves that hold glass or canned goods that could be damaged if they fall off the shelf.


Our storage area holds a one-year longer-term storage (wheat, sugar, beans, etc.) as well as a three-month supply of foods (that we regularly eat) for our family of 5. The first two shelves on the right hold most of the food items, a supply of paper products, and some small water containers. The shelf at back-left holds first aid supplies, empty canning jars, bathroom supplies, and light bulbs. The space between the rolling shelves and the far-left shelf is full of laundry soaps, cleaning supplies, and toilet paper (not pictured). The far-left (and top shelf of the others) is full of other miscellaneous storage.

Most of our longer-term supply is in buckets and boxes of #10 cans on the bottoms of the shelves. I have some carpet samples on the floor to keep the buckets off of the cement floor. I don't stack the buckets more than three high so that the lids won't crack. You can't see these in the pictures, but I also have two buckets with twistable-gasket lids tucked in the back. One is filled with smaller packages of brown sugar, the other with powdered sugar. My supply of oil is inside a paper box (upper right) to protect it from degrading from the ambient light.


I actually won the rolling-can unit in a contest. I don't think I could have justified paying the price otherwise. I added a steel grid on top so that I could store breakfast cereals and other boxed items there.

There are some additional areas of storage in other parts of our house. Most of the toothpaste, soap and shampoo are kept in the boys' bathroom (which keeps them from walking through the house while dripping wet looking for replacement supplies). I also have a small pantry with a supply of regularly-used items including buckets of flour, rice, and sugar. We have water barrels and emergency kits in the garage.

Thanks Wendy! What a great space! Go check out iPrepared for some great real life application of food storage and emergency preparedness.

Tuesday, March 22, 2011

Food Storage Tuesday

Every Tuesday, we post specific items you should gather in order to supplement your emergency car kit, your three-month supply, and your longer term storage.  If you are new to our blog, don't worry!  You won't be left behind.  Just start up where we are and follow along.  You will eventually have everything completed.  Once the car kit is complete, we'll be putting together 72-hour kits again (week by week).  Once those are done, we'll gather the car kits again.  So don't worry, just jump on in and join us where we are today!


It's our last week for the car kits!!  This week, add a pocket knife to your kit, as well as some cash.  You can choose the amount, but I recommend something like $20 or so.  You should be sure to have a good mix of bills and change, and keep it in a baggy so that it's waterproof.  As far as pocket knives go, you can find those pretty much anywhere and there are lots of brands/sizes to choose from.  Next week we'll be diving right into the 72-hour kits so get ready!


How's your three month supply coming along?  Last night around 9:30 I found myself perusing the local Food Lion for a mouse trap.  Yep, we saw a mouse scurrying along our kitchen floor.  Actually, we barely saw it, because I'm telling you that it was pretty much just a streak across the floor, that thing moved so fast!  Anyway, naturally we don't have any mouse traps lying around in our storage, hence the reason I was at the grocery store so late.  Long story short.... it might be a good idea to store things like mouse traps and other bug killers in your storage!  I know I plan to never be without one again (if I can help it). (And yes, thankfully we caught the mouse last night.  Whew.)


This month for our longer-term storage we are gathering oats!  You can store oats in #10 cans, or in 5 gallon buckets, or in the foil pouches.  Any other methods I'm missing?  Which method do you prefer?

Monday, March 21, 2011

Motivational Monday


“The world would take people out
of the slums. Christ takes the slums out of
people, and then they take themselves out
of the slums. The world would mold men by
changing their environment. Christ changes
men, who then change their environment.
The world would shape human behavior, but
Christ can change human nature.”

~President Ezra Taft Benson (1899–1994)

Friday, March 18, 2011

A Food Storage Oops Moment

Instead of our regularly scheduled Food Storage Friday post, I bring you this emergency (pun intended) post.

A couple of weeks ago, being a little short on funds, Mountain Man and I decided to see how long we could go by just buying perishables (produce, dairy, etc) at the store and eating up our 3 month supply at home. Verdict: I'm already out of white flour!

WHAT?

Granted, I bake a little more than the average mom, but turns out my estimate of how much white flour we eat as a family was wildly miscalculated. I'm so glad we tried this little experiment so I can readjust our flour needs, so when it really counts, we won't go without. Although my bookclub friends didn't complain about the whole wheat donuts they ate. And did you see how Brittany's focaccia turned out with whole wheat flour instead of white flour? Yep, I'm not running out of wheat any time soon.

I've determined that everyone ought to try my unplanned experiment: stop going to the store and see if your calculations on your 3-month supply of food are right.

Which food storage item do you think you've miscalculated on?

Ever thought of doing a practice run?

Thursday, March 17, 2011

Food Storage Hunt: Aleasha from Safely Gathered In

Aleasha, one of Safely Gathered In's own columnists, is sharing her food storage space. (Yes, I just linked to myself. Force of habit.)


A giant rotating can dispenser...swoon.


I don't really hide food anywhere else other than in the pantry. (Aleasha has a huge pantry, probably the size of my daughters' bedroom.)

And I don't actually have very much food because of the move (she's using the same moving method as I am). We do have an extra fridge/freezer and a free standing freezer in our garage that we keep food in too.

Thanks Aleasha. Love that everyone's style is so different!

Wednesday, March 16, 2011

Food Storage Hunt: I Dare You to Eat It!

We're so pleased to have Liesa from I Dare You to Eat It on our Food Storage Hunt today. She has some incredible ideas for storing food around your house. Take a look!


Here are some shots of our nifty food storage for your viewing pleasure.

Our 14 year old's queen mattress is actually floating on 32 cases of dry goods. (She never vacuumed under there anyway.)Those 32 cases equal almost HALF of the recommended amount of long-term food storage, based on the numbers found on providentliving.org, for a family of five adults, for one year. Are you surprised? I was. Used to think that if I wanted to be completely compliant with the suggestions from the First Presidency, I'd have to build onto the back of my house. Not so! Food storage takes less space that we may think. But Lizzie doesn't care so much about any of that. She's just happy that the custom made rumba dust ruffle disguises the Prophet's eatable insurance plan.


The small storage closets that flank her attic bedroom are also packed with the remaining balance of our food storage cases. You can see how I've placed light weight furniture, that's easy to move, in front of the food storage closet doors. The attic family room has the same storage configuration and it's amazing to see how many boxes, each holding six #10 cans, may be stashed in the "not so big" spaces. The knee wall closets built under the roof's rafters may be odd geometrically but they capture space that's typically lost in homes.


Before I purchased our sectional I even had my upholsterer price a series of seat and back cushions with a separate kick pleated skirt that could be used to build my own covert seating arrangement atop cannery boxes. (They say the first step is to admit you have a problem.) So that's basically a confession, but I swear it would work if someone needed to get really creative!


Last of all, I'm sending you a shot of how I organize my kitchen cupboards. This is how I store, and actually use, my three-month supply. It's how I protect my investment. All the dry, canned, or bottled ingredients used in a specific "normal" family favorite recipe are stacked and group together on each shelf. This simplifies a significant portion of the daily routine. Have you ever had cupboards full of food and still not known what to cook for dinner? Organizing by recipe completely overcomes that problem.When I began to give food storage/provident living presentations in Nevada, audience members from the food and beverage industry informed me that what I awkwardly considered idiot proofing my kitchen, or quite possibly turning into some kind of food storage freak, was in fact the way restaurants are organized. Ding! Ding! Ding! Restaurants are in the business of providing food in THE most efficient manner every single day. AND SO AM I! Not having a wonderful storage pantry, in this old house (ahem), I had to reconsider the way I was using the limited space in my kitchen. The Belgian waffle iron, turkey platter, seasonal dishes, and extra goblets were all relocated to the basement so that my three-month food supply could be stored in the kitchen. With my food storage meals grouped and ready for production, meal prep became a no-brainer.

And that brings up something I feel is vital when we talk about food storage. Just as it says in Amos 3:7, provident living is a REVEALED SECRET. It's a better way of life! Having a viable food storage makes life easier because it saves money and time! Less of my effort is wasted on constantly re-designing or re-engineering my family's meals. I've figured it out once, I'm following a system, and I enjoy the freedom and clarity that affords. Who doesn't need more of that?

Thanks Liesa! Take a look at her blog, she has some great recipes up---I've tried a few myself.

Monday, March 14, 2011

Motivational Monday


1 aThen shall the kingdom of heaven be likened unto ten bvirgins, which took their clamps, and went forth to meet the bridegroom.
2 And five of them were wise, and five were foolish.
3 They that were foolish took their lamps, and took no oil with them:
4 But the wise took oil in their vessels with their lamps.
5 While the bridegroom tarried, they all aslumbered and bslept.
6 And at midnight there was a cry made, Behold, the abridegroom cometh; go ye out to meet him.
7 Then all those virgins arose, and trimmed their alamps.
8 And the foolish said unto the wise, Give us of your oil; for our lamps aare gone out.
9 But the wise answered, saying, Not so; lest there be not enough for us and you: but go ye rather to them that sell, and buy for yourselves.
10 And while they went to buy, the bridegroom came; and they that were aready went in with him to the marriage: and the door was bshut.
11 Afterward came also the other virgins, saying, Lord, Lord, open to us.
12 But he answered and said, Verily I say unto you, I aknow you not.
13 aWatch therefore, for ye know neither the day nor the hour wherein the Son of man cometh.

Matthew 25:1-13

Friday, March 11, 2011

Food Storage Friday: Chicken Barley Chili

Catch up on reading, we've been busy this week:

Reader Question: Car Kit, Emergency or Everyday Use?

Food Storage Hunt: Check out my food storage spots!


Today's recipe comes from the back of the quick barley box. I can't remember why Mountain Man was holding the box (maybe shifting contents of the cupboard?) but he looked at the back and said, hey this looks delicious...hey! it's food storage friendly! What a catch.


Canned goods: Salsa, black beans, diced tomatoes, whole kernel corn, chicken

Mountain Man commented that a good way to get onions into a food storage dish is to add salsa.


Seasonings: cumin, chili powder, and chicken bouillon. The recipe calls for chicken stock, but I store bouillon instead for space saving.

Star of our show! Barley has a delicious texture. I like it better than rice.


In the pot add the tomatoes, salsa, and bouillon

Don't forget to add the water for the bouillon when you add the water from the recipe.

Add the barley
chili powder

cumin

And bring to a boil. When it's bubbling nicely, turn the heat down to a simmer and let it go, covered for 20 minutes.


Use this downtime to drain your canned chicken


and shred it for better texture.


Also drain and rinse your beans now. You drastically reduce the amount of sodium in your canned beans by draining and rinsing them.

After the soup has simmered for 20 minutes, it's time to add the rest of the ingredients.

Corn, undrained!

Beans
chicken
Stir it all together.

Bring to another boil over high heat. Then reduce the heat again and let simmer for 5 minutes or until your barley is done. My barley was done before five minutes were over.

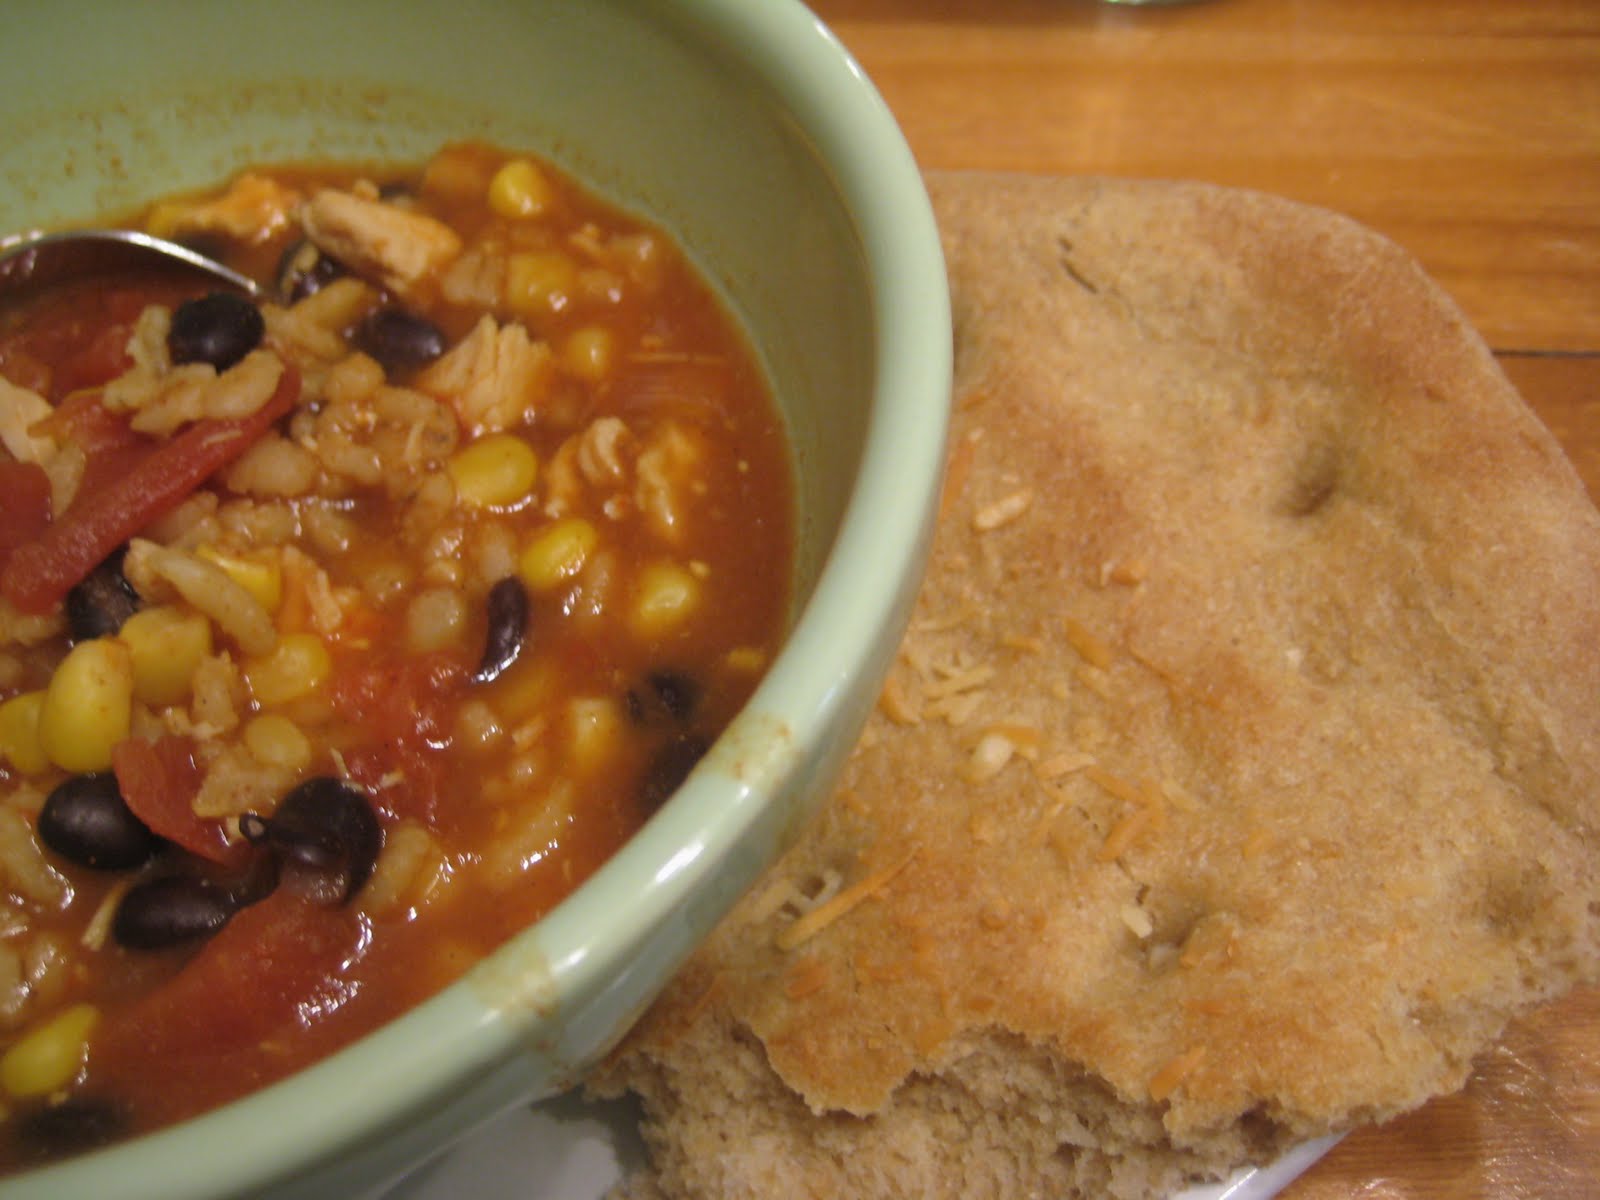
The result? A delicious and hearty food storage chili.


Served with a little whole wheat focaccia is just what the doctor ordered for a chilly night.


Chicken Barley Chili
on the back of the Quaker Quick Barley Box

1 (14oz) can diced tomatoes
1 (16oz) jar salsa
1 (14oz) can chicken broth (or I used 2 chicken bouillon cubes and 2 cups of water)
1 cup quick barley
3 cups water
1 Tbsp chili powder
1 tsp cumin

Combine these 7 ingredients into a (big) pan. Bring to a boil over high heat, cover, and reduce heat to low. Simmer for 20 minutes, stirring occasionally.

1 (15oz) can black beans, drained and rinsed
1 (15oz) can corn, undrained
1-2 (13oz) can chicken (I used one can and I thought it was plenty)

Rinse and drain black beans. Shred chicken in separate bowl. Then add chicken, black beans and corn to the chili mixture. Increase the heat to high and again bring to a boil. Cover and reduce to low and let simmer for 5 minutes or until barley is tender. Makes 11 cups.