
Every Tuesday, we post specific items you should gather in order to supplement your 72-hour kit, your three-month supply, and your longer term storage. If you are new to our blog, don't worry! You won't be left behind. Just start up where we are and follow along. You will eventually have everything completed. Once the 72-hour kit is complete, we'll be putting together emergency car kits again (week by week). Once those are done, we'll gather the 72-hour kits again. So don't worry, just jump on in and join us where we are today!
This week for your 72-hour kits, add toiletries: soap, shampoo, toothbrushes, toothpaste, etc. Don't forget to also add diapers/wipes and feminine products - whatever your family requires. Travel size bottles are perfect for this situation - put some in everyone's pack, or in half of your families' packs (whatever you think you'll need, and depending on space).
How's your three-month supply coming along? Don't forget, make a food storage menu plan and a master shopping list, and go from there. Don't get overwhelmed - just take it one step at a time.
This month for our longer-term storage, we're gathering "other" items (besides the 4 basics: wheat, beans, rice, oats). These are things that you want to have more than three months' supply of, for example: flour, salt, seasonings, sugar, yeast, powdered milk, honey, baking soda, etc. Choose one (or two) things, and stock up as much as you can during the month. Of course, it would be ideal to find something on sale so that you can really stock up and save.
Tuesday, June 14, 2011
Saturday, June 11, 2011
Gardening tips from our readers!
Well, we didn't get a ton of gardening tips emailed to us, so maybe you are all waiting to read some?? I am the same way - I don't feel like I have very many (or any!) ideas/tips to share about gardening, but I sure love hearing what other people have to share.
Rev. Lawrence shared some ideas about "lasagna gardening":
Something I just learned about recently and am trying this year is called “Lasagna Gardening.” I learned about it at a home show expo and found it interesting because the concept involves no working of the soil. (I’m a disabled vet, so I’m limited in how much physical labor I can do.) http://www.lasagnagardening.
I used flattened cardboard boxes as my “smother layer” followed with layers of compost, wood mulch, grass clippings, dry leaves, cheap dog kibble, and garden soil from last year’s garden (we moved the garden to a new area in the yard). The guy from the Garden Club who taught the class showed us photos of a garden with peas growing over 5 feet high and corn over 8 feet.
Kathleen was kind enough to share her blog address with us, where she has several gardening posts listed. Click here to check out the gardening posts!
An anonymous commenter also shared some ideas for square foot gardening:
I love the New Square Foot Gardening. You can grow a huge crop in 20% of the space of traditional gardens, and you use a special soil called Mel's Mix that is perfect for plants to grow in. There are few weeds to worry about with this method, and you can grow food in three different seasons. You can reuse the soil and frames from year to year.
There is also a technique called "wintering over" where you plant seeds in soil in 1 gallon milk jugs (with a small flap cut in a top quarter of the jug for easier planting). You set the jugs outside in the cold (even when it's snowing) and when the seed has grown to a few leaves above-ground, they can be transplanted to their designated garden spot. Because the seeds grew in adverse conditions, the plants will grow in cooler temperatures of late winter.
Square Foot Gardening also has a method for growing food in the cold months.
Thanks Rev. Lawrence, Kathleen, and Anonymous for your tips. Good luck to everyone with your gardens this year! We'd love to hear about how they go!
Thursday, June 9, 2011
Gardening Series: Square foot gardening with Emily from "The Harried Homemaker Preps"
Today's guest post is by Emily from The Harried Homemaker Preps:
Our family moved to a house on 5 acres in the country in 2007. Over the past four years, we have been slowly increasing our self-sufficiency. One day, I hope to have chickens, an orchard, and to grow most of our vegetables ourselves. We’re still far away from that goal, but we are making determined steps in that direction.
Our family moved to a house on 5 acres in the country in 2007. Over the past four years, we have been slowly increasing our self-sufficiency. One day, I hope to have chickens, an orchard, and to grow most of our vegetables ourselves. We’re still far away from that goal, but we are making determined steps in that direction.
VEGETABLES:
This is what our backyard looked like when we moved in.

That’s a whole bunch of new-construction fill dirt you see there. Underneath the fill dirt is hard-packed clay. Not so great for gardening.
Nevertheless, I figured that since we live in the midst of farm country, gardening would come naturally. The following spring we bought a tiller and began breaking ground for a large garden.

My husband, the wannabe farmer
As you can see, we had a hard time even getting grass to grow, which should have been a clue! Despite adding manure and organic fertilizer, we didn’t get much of a harvest in 2008 or 2009.
I had heard someone talk about the wonders of Square Foot Gardening, so in 2010, we decided to give it a shot. Square Foot Gardening was conceived by Mel Bartholomew and is described in his book, All New Square Foot Gardening . The gist of it is that you plant your crops closely together in raised beds that are filled with a special soil mix. This has the effect of a greater yield per square foot and a significant decrease in the amount of weeding and watering that is necessary.
My husband used the following materials to construct a 4 foot by 4 foot box:

Cedar boards, wood lath and weed cloth
Then, we created the special square foot gardening soil called “Mel’s Mix”.

Mel’s Mix is made from 1/3 peat moss, 1/3 vermiculite, and 1/3 compost.

A completed Square Foot Gardening box
We placed landscape fabric under the box, filled the box with Mel’s Mix, and placed the grid on top. The grid is a guide for planting; you plant a certain number of seeds/plants per square foot, depending on the type of plant. We planted the rest of our garden as usual and filled our square foot box with two varieties of green beans. We were completely astounded by the result. We had TONS of green beans and no weeds. The rest of our garden? It was same old story – lots of weeds, few vegetables.
This year, we decided to completely convert our garden to the Square Foot Gardening system.

We made 7 boxes that total 380 square feet. The paths between the boxes were lined with weed cloth and covered with pea gravel.
Here’s the master plan:

The planting dates are based upon our location in Zone 5, with adjustments for our property’s chilly microclimate.
Even though we’re still experiencing some glitches (mainly due to rampaging rodents, with poor weather and a family vacation thrown in), things are looking up.

This is part of the box we reserved for our children. My eldest child is growing beets, pod peas, cabbage, and romaine lettuce. We allowed each child to select, plant, and maintain their own veggies. It is precious to see how much they are embracing their roles as gardener-in-chief.

These cute baby leaf lettuce sprouts will soon be tall enough to harvest. You snip off the leaves and they grow back.
It is particularly important in a Square Foot Garden to have some sort of support for plants that would sprawl about and take up too much room. Sweet potatoes, cantaloupe, cucumbers, and tomatoes are examples of plants that should be supported.

Four types of tomatoes, both hybrids and heirlooms
Our experience is that the tomato cages sold at garden centers are too flimsy. We used those cages in our first year of gardening and our tomatoes were so vigorous that the whole thing collapsed into a sad heap. (I should mention that the tomato incident happened at our previous residence. We have yet to grow monster tomatoes at our current home. Keeping my fingers crossed for this year!) Our solution is to make our own cages. These are constructed out of 5’ remesh wire (with 6” openings) and fastened to the ground with T posts. Nothing short of a tornado is going to move these! We also use the remesh wire as trellising for the vining crops we grow, like watermelons and cantaloupe.
Herbs:
If I could grow only one type of plant, it would have to be herbs. If you’re buying those little packages of herbs they have at the grocery store, you are getting ripped off! Herbs take little space or effort to grow and will save you tons of money.

My herb garden in mid-May
My herb garden is located near my kitchen, which is super handy. It’s hard to kill herbs, and they don’t care if the soil is poor. I grow chives, sage, oregano, lavender, thyme, mint, and French tarragon as perennials. My dill and cilantro reseed by themselves each year, but I have to replant basil and rosemary since our harsh winters kill them off. Parsley is technically a biennial, but I have yet to be able to keep it alive over the winter so I can harvest seed from it. I end up replanting it new each year, too.

Spearmint
Here’s a tip I learned the hard way: plant mint in a container. Mint is incredibly invasive and will take over your entire garden if given half a chance. We ended up digging out our mint and replanting it in a large terra cotta pot that we sunk into the garden. The pot keeps the mint from spreading.
Berries:
We have plantings of two types of thornless blackberries as well as raspberries. We also started some strawberries in our Square Foot Garden this year, though they don’t seem to be doing so well.

Blackberries in the foreground, raspberries in the middle
How does all of this fit in with food storage and preparedness?
Our goal is to become more self-reliant in all aspects, but especially when it comes to our food. We will probably never grow our own wheat, but we can certainly grow our own vegetables and preserve some of them for future use.
I currently dry and freeze herbs for future use. Chives freeze well. I also freeze basil pesto in ice cube trays and then store the cubes in freezer bags. I never have to buy oregano because I dry my own.

Air drying oregano in my laundry room
I am also a huge fan of canning – pickles, tomatoes, jams, applesauce, green beans, meat, you name it. This summer I plan on processing my tomatoes into ketchup, salsa, and other condiments as well.
Another way I plan on preserving my harvest is through dehydration. By using a dehydrator, you can dry tomatoes, green peppers, and other vegetables and fruits. You can then vacuum seal them in bags or canning jars for a lengthened shelf life.
I even bought a cayenne pepper plant this year and I think I’ll try my hand at making red pepper flakes.

I’m hoping for a bountiful harvest of these pepper plants so I can dehydrate the excess
We didn’t start off this large and we certainly have had our share of failure. The point is to do something, anything. Any size garden can produce delicious fruits or vegetables and give you an education on horticulture. It’s fun for the whole family, great exercise, and a valuable preparedness skill.
--------------
Emily is a homeschooling, stay-at-home mom to four children in the Midwest. She blogs about her family’s misadventures in preparedness at The Harried Homemaker Preps.
Wednesday, June 8, 2011
Gardening Series: Carin from "A Matter of Preparedness"
It's gardening week! Today's post is by Carin from "A Matter of Preparedness".
I was grateful, but pleasantly surprised to be invited to write a guest post on gardening for the wonderful and respected blog, “Safely Gathered In”. Lest you think that gardening has come naturally to me, it really has not. My sister was born with a green thumb, and with her careful guidance, practice, and lots of prayer we do actually reap the benefits of our efforts. You can find many books, videos, and blogs teaching you the basics of gardening. However, I (we….meaning my sister Jenifer B and I) are including some of my favorite suggestions to make the process hopefully more successful for you.
A little more about Carin:
I was grateful, but pleasantly surprised to be invited to write a guest post on gardening for the wonderful and respected blog, “Safely Gathered In”. Lest you think that gardening has come naturally to me, it really has not. My sister was born with a green thumb, and with her careful guidance, practice, and lots of prayer we do actually reap the benefits of our efforts. You can find many books, videos, and blogs teaching you the basics of gardening. However, I (we….meaning my sister Jenifer B and I) are including some of my favorite suggestions to make the process hopefully more successful for you.
- Gathering: You need to start with good, viable seeds. Certainly, you can get them from your local store, but also consider Seed Banks. If you aren’t familiar with Seed Banks, see this video here on youtube. Seed banks are a great place to find heirloom seeds that are appropriate to plant in your specific area. To find a seed bank in your local, contact local garden clubs to find one or more of these. Then, learn how to gather your own seeds at the end of your growing season.
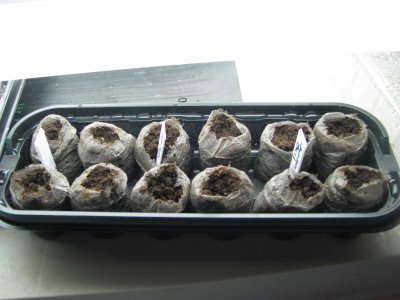
- Seedlings: I choose to give my plants a chance to survive! So I start them in peat pellets.
- Nurturing: The following is all from my sister…..and I copy her. She has made this unique set up in a shed in her backyard. I have done this in a spare room in my basement. The seedlings and later the plants are placed in this ‘environment’.
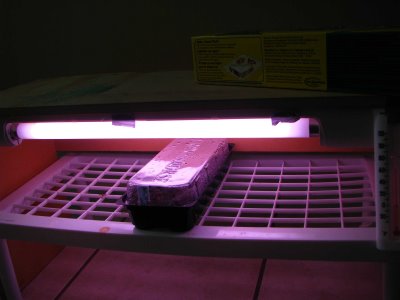
- Graduating to a larger “environment”: She then moves them to a larger shelving system that has hanging lights. You do not need specific ‘grow lights’, just inexpensive fluorescent lights that she hangs from chains so that you can adjust the light to hang higher as the plant grows.
- Keeping it warm: She then uses an inexpensive Mylar blanket to surround the shelving unit.
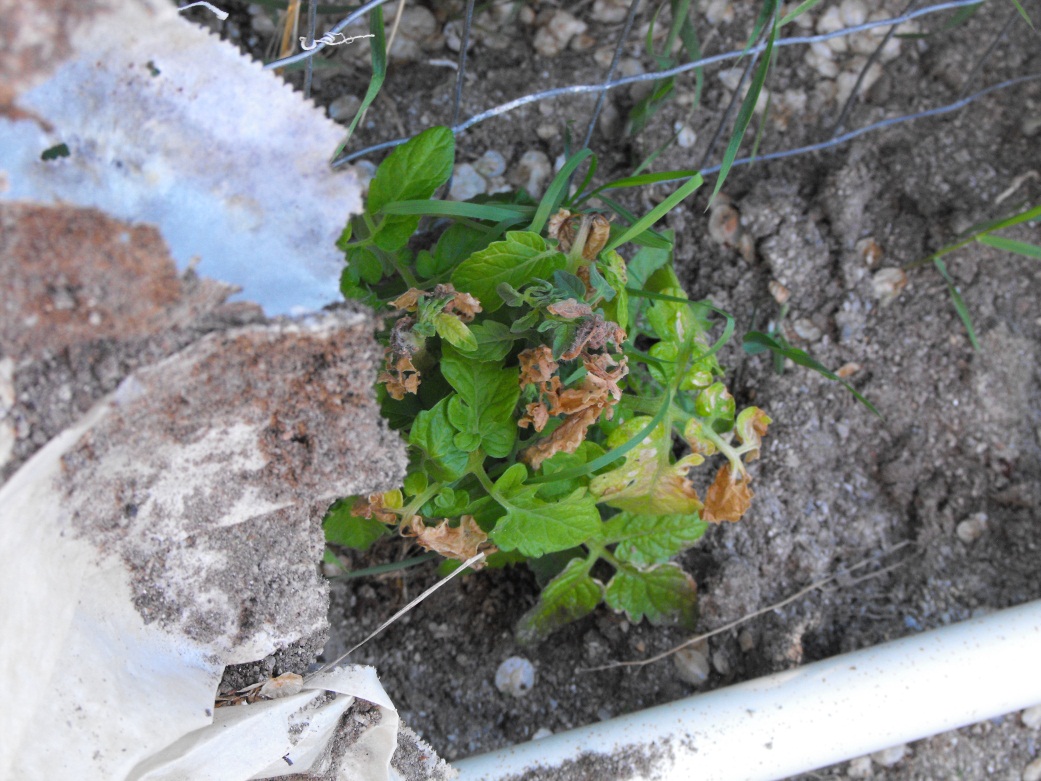
- Outside: This is something I tried last year and it worked very well. Even though Cloches can be considered inexpensive if you purchase the $.99 type, I just could help trying to make one. The Cloche on the left was purchased from our local Nursery. The one on the right was made from 2 sheets of freezer paper.


Here is how they turned out. The one on the left is the Cloche that I made; the one on the right is the purchased Cloche. 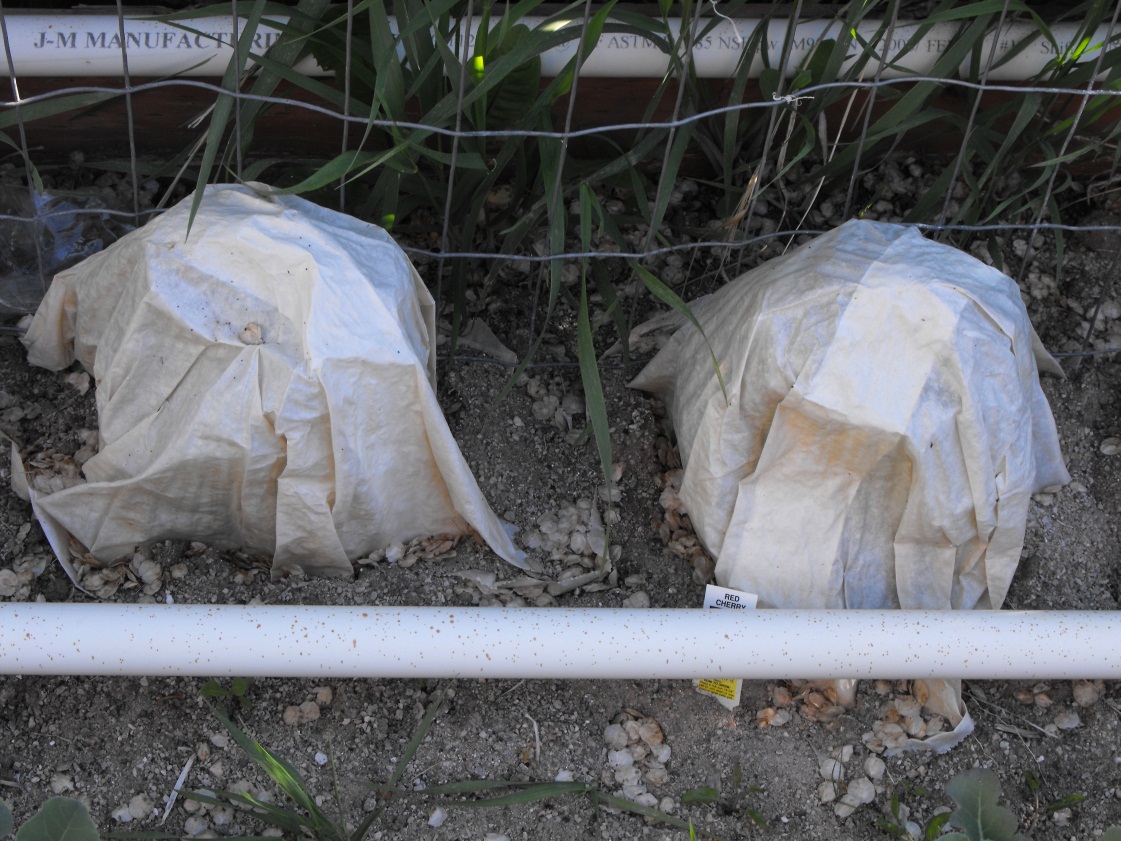
- Preparing: I do so many things with produce. I can and dehydrate foods. One of the most popular posts on our blog is on the use of Clear Gel. I love this product and it lasts indefinitely. It is a great item to include into your Food Storage.
- Reaping: There are many seeds that we plant each day. Today, our family reaped abundantly. Our youngest son entered the Missionary Training Center. All those early morning scripture study sessions, Family Home Evenings, Church activities, and family time were culminated for our son and our family. It’s just like gardening…..keep working at it until you find the plan or schedule that works for you.

A little more about Carin:
I began to write "A Matter of Preparedness" to provide information and education to our local ward/congregation on issues of preparedness as I was asked to serve as the Food Storage Specialist. In our world today, people are very busy and cannot always attend a class etc. However, the internet is available 24/7 making the information available when folks can find a moment to read. I have a large family, am an overly employed professional, and help run our family business. My motto is that “Food Storage and Preparedness constitute skill sets supported by materials and equipment.” You can have all the equipment and food storage in the world, but unless you know how to use it, you may not be as prepared as you would wish.
Thanks, Carin!
Thanks, Carin!
Monday, June 6, 2011
Motivational Monday

"It is easy in the world to live after the world's opinion; it is easy in solitude after own own; but the great man is he who in the midst of the crowd keeps with perfect sweetness the independence of solitude."
Ralph Waldo Emerson (1803-1882)
-- Series I. Self-Reliance
Thursday, June 2, 2011
Calling all gardeners!
Get excited, because next week is our Gardening Series here on the blog. We have some great guest posts lined up, written by some of our fabulous fellow food storage bloggers (there are lots of them out there!). You aren't going to want to miss it, so stay tuned.
We also plan to post an article next week full of gardening tips.... from you! So please, if you have any gardening tips, tricks, or secrets, email us at safelygatheredin (at) gmail.com. Please keep tips to a few sentences each, and send as many as you'd like! Tips can range from how to start your garden, what to put in the soil, what to plant, etc. We'd also love tips about cooking with and/or preserving your harvest. I don't know about you but I can use all the advice I can get!
So, send 'em in and look forward to all things gardening next week!
Wednesday, June 1, 2011
Freezer food storage

One thing that Abbie and I really push for here on the blog is that when it comes to food storage, pantry-stable foods are ideal. This is evident in our food storage recipes: none of the recipes we share weekly contain any refrigerator or freezer ingredients. Obviously, this poses a bit of a challenge when it comes to finding good tasting, healthy meals, but I think we've been pretty successful and we've heard positive things from many of you who have tried out our recipes (thanks, by the way!).
The benefits for a pantry-only food storage are obvious. We've probably all heard many stories of people in emergency situations (hurricane, tornado, etc.) losing power in their homes for an extended period of time, thus losing everything in their freezers. It would be a mistake to base your entire food storage plan (or even half of your plan) around ingredients and meals from your freezer.
That being said, however, don't ignore the freezer! Freezers are wonderful (and I'm hoping to acquire one sometime soon!). Freezers make it possible for us to eat "fresh" and healthier foods throughout the winter, something that canned goods (from the store) do not. They can also store ready-made meals that just need to be thrown into the oven, which makes meal preparation a snap (and wouldn't that be wonderful in an emergency?). Freezers are great assets to food storage, but we just have to be careful that they don't store the primary sources of the meals in our food storage plan.
So, I have a question for you: how do you incorporate your freezer foods into your food storage plan (if you do)? And, what do you have planned in case your power goes out? (generators, etc.)
Subscribe to:
Posts (Atom)


